Flow Rate benchmarking of a Hotend
The hotends of common 3D printers look pretty much the same and mostly use these small nozzles where the material is melted. I think everyone has already heard that for printing faster and especially with bigger nozzles a so called volcano hotend might be necessary. They use longer nozzles and give the filament more time to properly heat and melt before the plastic leaves the nozzle. The material throughput is usually characterized by the flow rate so the amount of material that is pushed though the extruder per second. This property is linearly proportional to the printing speed, nozzle diameter and layer height and can be visualized for example in PrusaSlicer. If you’re printing with a standard 0.4mm nozzle, this value is usually single digit, if you’re not going crazy fast. Bigger nozzles and the often-resulting thicker layers though can drastically increase that value. The question now is, how you can find out what is still possible with your current setup and when it might be a good idea to upgrade to a volcano heater block. I’ve even seen these fancy nozzles that claim higher melting capability since the surface area is increased by its shape.
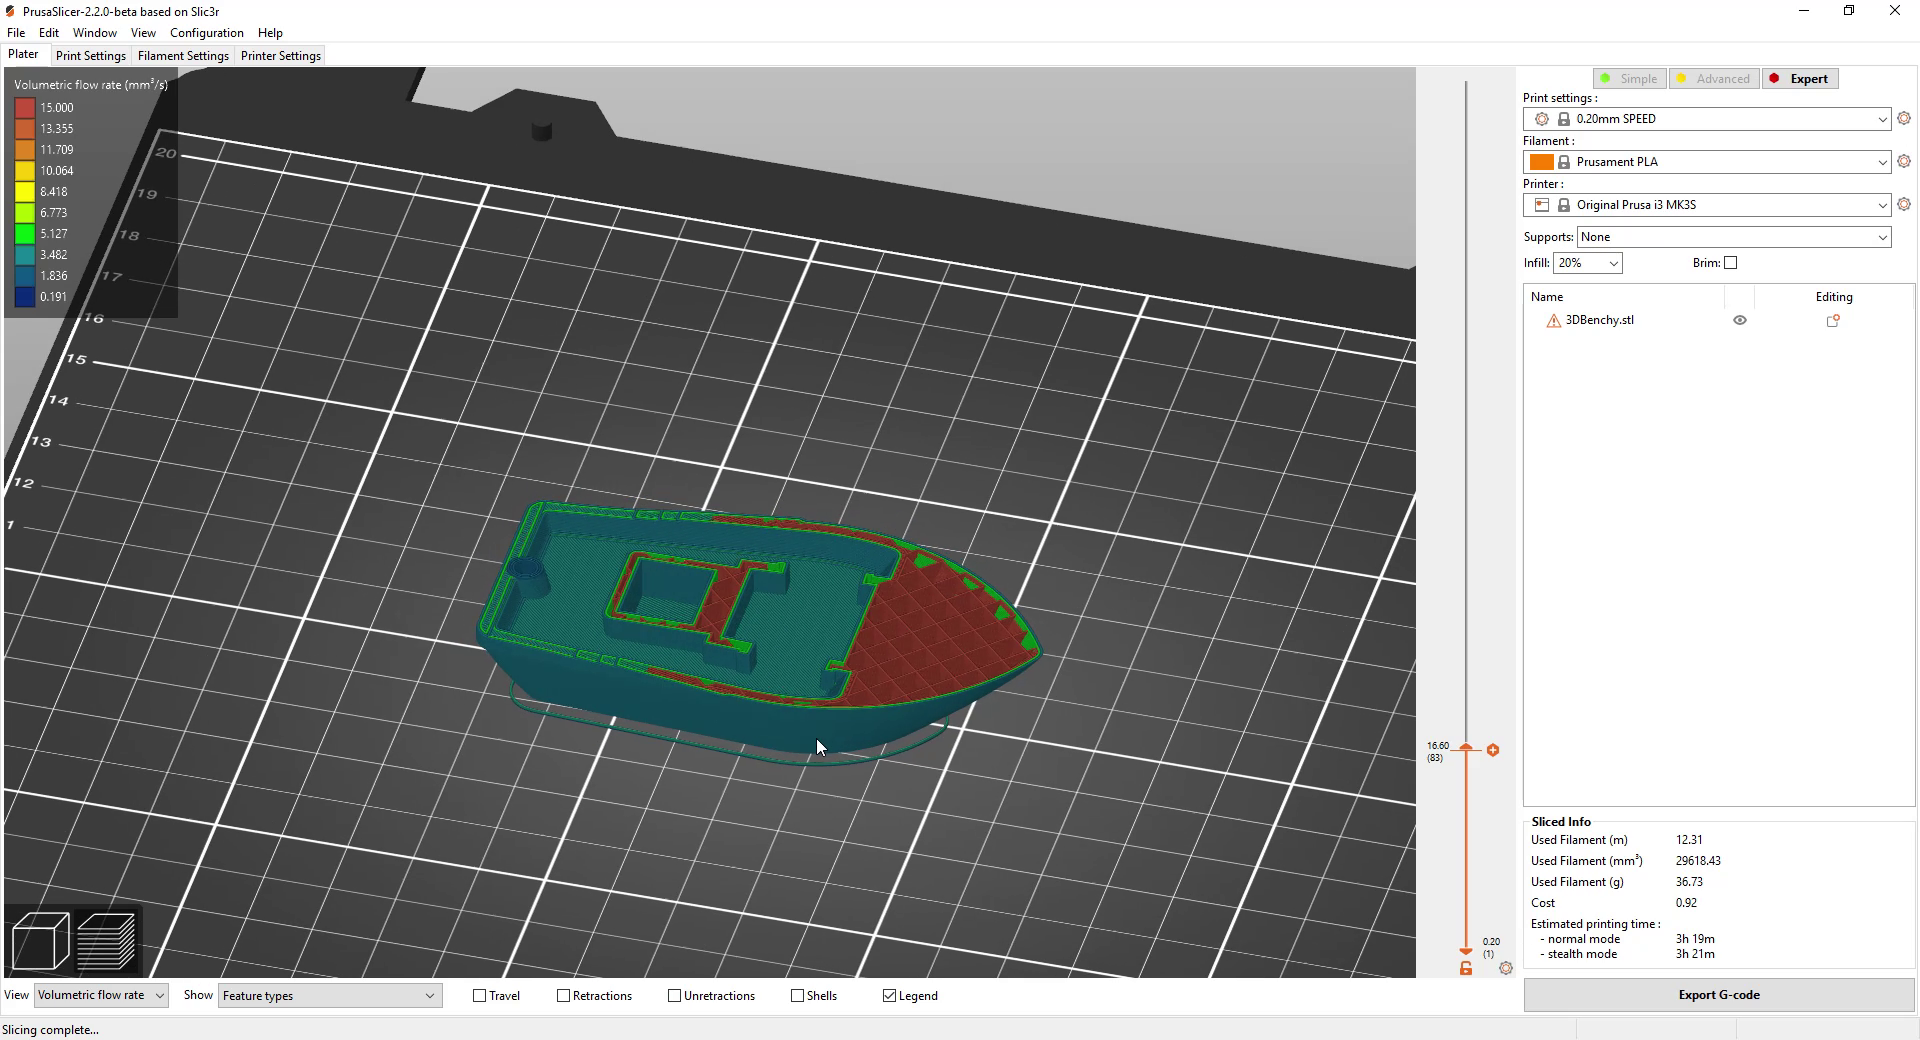
Flow rate visualization in PrusaSlicer
In order test out the capabilities of my setup, I came up with a very simple test that you can also perform on your own. The only thing that you need is a fairly precise scale and a roll of filament that doesn’t vary that much in diameter. Link to a suitable scale in the description by the way. After of course loading the filament into your printer, in my case, I used Purple PLA from RedLineFilament, you set it to the temperature you usually print at. For my PLA filament that is 215°C. I prepared a short GCODE in which I first prime the nozzle with 20mm of filament, then pause a tiny amount of time in which I manually remove the string and continue extruding half a meter of filament at a set speed. The material settles on the build platform and creates these really nice, round structures which diameter is varying depending on the extrusion temperature and therefore softness or viscosity of the material. Reminds me of probably the first video I’ve ever seen by SmarterEveryDay many years back and where Destin shows the same property and mathematical description using honey. Really worth watching! So I started extruding the material at a slow 3mm³/s and increased it in 3mm³/s steps. The lowest speed is equivalent to printing with a 0.4mm nozzle at 0.12mm layers at 50mm/s. At some point, with my particular setup which is a Prusa i3 MK3s with the E3D V6 hotend, the filament starts skipping from time to time. This was at 15mm³/s extrusion rate and would be equivalent to 0.3mm layers with a 0.4mm nozzle at 100mm/s. Increasing it higher made it skip even more often. This is already an indication that at this point the setup is overwhelmed, but the even more interesting thing is putting these extrusions on a scale and weighing them. We always told the printer to extrude the same amount of filament but the weight of the extruded material slowly decreases at higher speeds . Why is this happening? This is interesting because one would think that there shouldn’t be any slip in a dual drive system as the Prusa has, until the extruder starts skipping. The reality though is that the material plastically deforms in the gears and depending on the back pressure of the hotend will always show a slight slip in the system. This is little at first and even at a quite fast extrusion rate of 9mm³/s the under-extrusion is only 3% but as soon as the extruder starts skipping the drop-off is much bigger. So maybe take that into consideration when either tuning your e-steps or increase the extrusion multiplier slightly, when extruding faster. Maybe a flow rate dependent extrusion multiplier might be something really useful in a slicer. This might help to increase the dimensional accuracy of prints, where the infill is printed with significantly higher speeds than the perimeters, because I usually set the flow rate when looking at an infill surface but that might mean that I over-extrude a couple of percent at perimeters that are for example printed at half of the speed. Please note that especially with the cheap single gear extruders, the slippage might be way higher since they only drive the material from one side and often only with a knurled gear. And just on a side note – if you like such investigations leave a like, make sure to subscribe to the channel and select the notification bell!

Extrusion Test - Fixed Temperature
This all means, that with a standard V6 setup and bondtech gears, around 10-15mm³/s is the extrusion limits, if, yes if you print at 215°C nozzle temperature. But how does the temperature add to the equation? Higher temperatures will decrease the viscosity of the melted plastic and will also help that the material properly melts in the first place resulting in less pressure in the extrusion system. In order to find the influence of the temperature on the maximum flow rate I basically performed the same test as before but fixed the flow rate at 15mm³/s and varied temperatures from 185°C to 275°C in 15K steps. Here is where we can see the circular shapes forming in the most satisfying way! If we weigh the piles and plot the results, we can see that the final melted material is again depending on the parameter temperature. Higher temperatures lead to less slipping in the extrusion system and from 185°C to 215°C we again even loose steps because the backpressure is too high! At 275°C we basically have no slipping even at 15mm³/s and the extrusion system works as well as before at 215°C but only 3mm³/s. All in all, that means that if you have extrusion problems, especially at higher speeds, increase the hotend temperature and maybe that solves it. 275°C might be a bit overkill, but start with maybe 10°C at first. If you still have extrusion problems then you should take a hotend upgrade into consideration.

Extrusion Test - Temperature Variation - Brass Nozzle
In the beginning I spoke about steel nozzles and if you need to increase temperatures if you print with those in comparison to standard brass nozzles due to the lower thermal conductivity. The reason why I did this test in the first place was, that I currently work on an abrasive nozzle test including carbide, ruby and a couple of hardened steel nozzles and I wanted to find a way to compare how they perform with non-demanding materials like PLA. So for this video now I already included a standard E3D hardened steel nozzle and performed the same temperature test as before. The result was that only at low printing temperatures of below 200°C I was able to see a noticeable difference in the extruded amount which probably means that if you’re not printing really cold, there shouldn’t be an increase in extrusion temperature necessary, at least if you’re using a high quality steel nozzle.

Extrusion Test - Temperature Variation - Steel Nozzle
I’ve been using E3Ds nozzle X for example on one of my Prusas for a year now and never felt the need to adjust temperatures in comparison to the brass counterpart, but I usually print on the hotter side. For the results of the other nozzles, stay tuned for the upcoming video! Please let me know your thoughts on this topic in the comments. How do you handle flow and extrusion temperature for different speeds? And if you test this on your own then also share your results!
G-Code for the flow test (the speed is given in mm/min ==> here 450mm/min = 7.5mm/s):
M83     ;relative extrusions
G1 F450 ;450mm/min speed
G1 E20  ;prime with 20mm
G1 F3   ;slow extrude for pause
G1 E0.1 ;0.1mm extrusion
G1 F450 ;450mm/min speed
G1 E250 ;250mm extrusion x2 to
G1 E250 ;trick max extrusion limit