Carbon Fiber Nylon in 3D Printing: PA6 vs PA12 Tested
So how do you say? Fool me once, shame on you. Fool me twice, shame on me. And this kind of sums up my past experience with 3D printing Nylon. In 2019, I 3D printed a bracket for my CPU cooler from carbon fiber Nylon6, and after only a few hours of use, it severely deformed under load and heat, resulting in my PC crashing. I somehow didn’t really learn from that, so a few years later I printed a VORON 0 from the same carbon fiber reinforced nylon, which was a huge mistake because I quickly realized that my prints deformed over time, requiring me to tighten all the screws basically every day because the material flowed away under the constant load. I’m sure I’m not the only one who had that experience so if you ever noticed something similar, please, share your stories in the comments!

Re-tightening all the bolts on my VORON Zero
My experience led me to abandon Nylon for my designs for several years until SUNLU reached out and asked if they could sponsor a video featuring their E2 filament dryer and their range of engineering materials. This was perfect because they produce the most common types of Carbon fiber filament we use in 3D printing, specifically PA6 and PA12 at a seriously reasonable price. They were super eager for me to share my story and investigate how to use Nylons properly in engineering projects! The FilaDryer E2 holds two spools side by side, and before I started printing any of my samples, I put both types of their Carbon Fiber Nylon at 80°C for 20 hours into the dryer to remove the remaining moisture. This is especially important for PA6 because that can hold up to 3% of water - that’s almost a shot glass of moisture for every spool. P12 is way easier to handle and only absorbs up to 0.5% moisture but still prints and performs better when completely dry. But the E2 is not only ideal for drying spools before printing, but since it can reach temperatures up to 110°C I’m now regenerating all my silica bags in it and even more importantly with this high of a temperature it can also be used for one of the most crucial steps when working with 3D printed Nylon parts that almost anyone neglects: annealing. The sturdy lid and the dual-pane insulated housing ensure the heat stays within the box and make the E2 the essential tool for your demanding materials. SUNLU allowed me to dedicate a lot of time to this investigation, and if you need a drying and annealing solution, definitely check them out using the link below!

SUNLU E2 Filament Dryer & SUNLU Nylon Filaments
🛒Product Links (affiliate):
SUNLU FilaDry E2: https://geni.us/SunluE2
SUNLU CF-PA6: https://geni.us/SUNLU_PA6-CF
SUNLU CF-PA12: https://geni.us/SUNLU_PA12-CF
But what’s Nylon in the first place? You’ll often see the terms nylon and PA used interchangeably. Nylon is the trade name used by Du Pont for their Polyamides, and it has become a common synonym. So, if you examine filament spools, you usually won’t see Nylon but PA, which is the abbreviation for Polyamide. I’ll loosely refer to all three terms as synonyms in this video. Typically, PA is followed by a number, like PA6 or PA12. The number indicates the type of Polyamide and shows the number of carbon atoms in the monomer. The monomers are the building blocks that when chained together form the polymer. There are 6 carbons in PA6 and 12 in PA12 - that simple. Although most Nylons generally have good strength, toughness, temperature and wear resistance, they also differ in some properties. As I’ve already talked about, PA6 is way more moisture sensitive than PA12. Besides that PA6 is also 10-20% heavier than its sibling. On the other hand it’s usually more affordable and you can get a spool of Carbon Fiber PA6 for as little as $50. And one thing that I learned the hard way is that PA6 seems to have a serious creep problem if you don’t post-process it properly.

Where the Numbers in PA come from
So, what is creep? Most of us know that materials usually have an elastic and a plastic behavior. Deform something a little and it springs back - that’s elastic. Deform it too much and it yields and bends permanently - that’s plastic. But here’s the tricky part: with some materials, like nylon, you don’t even need to overload them. Just leave them under a constant load, even well within their elastic range, and they will very slowly deform over time. That’s creep - your part literally flows away under stress. It’s why my 3D printed CPU bracket slowly bent and why the screws in my VORON ZERO constantly lost all their pretension.

Bent CPU Bracket
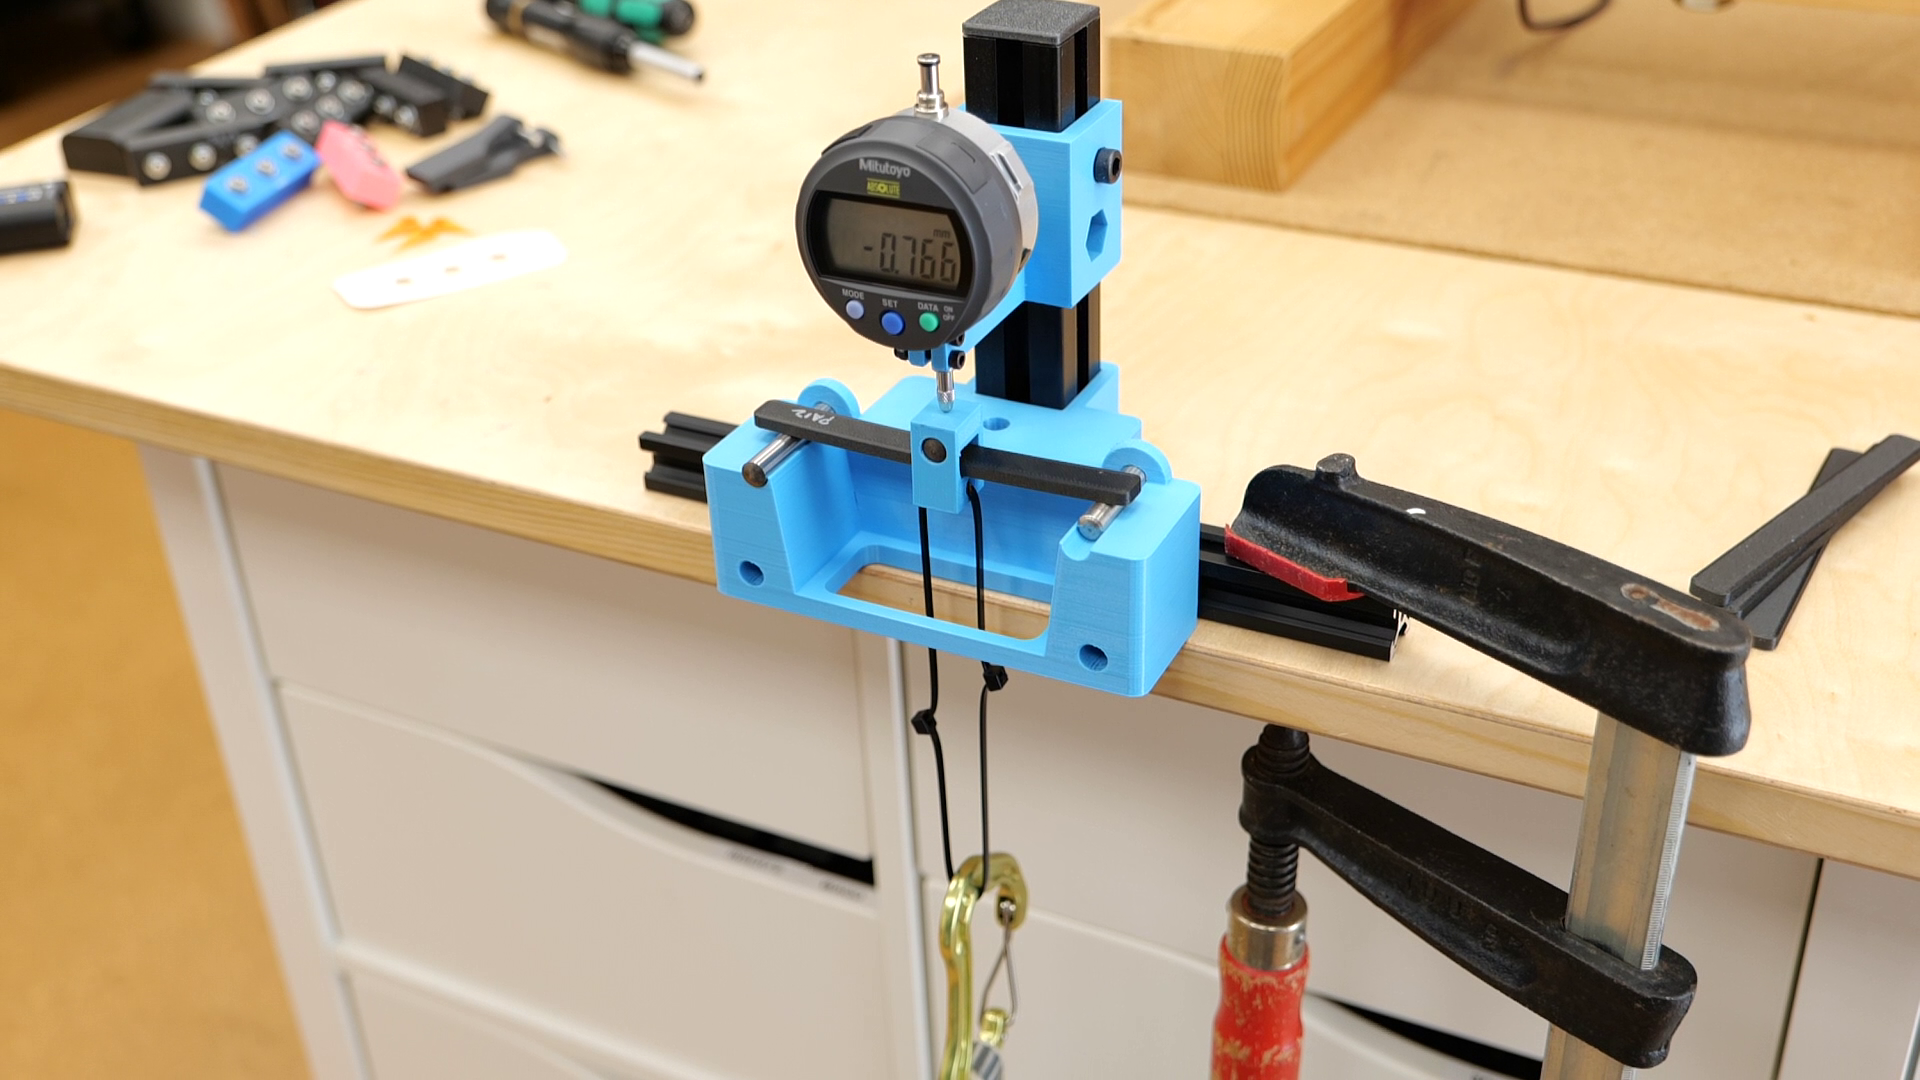
I set up two tests to investigate this. One aims to mimic my screw problem on the VORON Zero and involves compressive creep, where a screw is tightened to a specific torque. The sample is super simple. It’s just a block with 3 holes, though which i put a bolt which I tighten on the other side with a nut. This bolt is fastened by a torque screwdriver. This torque creates a pretension within the bolt, which then preloads our test sample. I chose the torque, which is 0.8 Nm for an M4 bolt, so that the compressive load is only about 50% of the material's tensile strength. If the pretension causes the material to creep, I will be able to re-tighten it and measure the angle with a dial. I plan to do this over the next few days to see how my Nylons and several other materials perform.

Torque Test with Indicator Needles
The other test mimics my bent CPU bracket and involves a set of springs that I load with weights. The weight is chosen so that the load on the springs is only 25% of their tensile strength, well below their load-bearing capacity, and I will measure the distance between two pins over the next few days. There are four springs on the wall: one is PA6, another is PA12. The two other springs are the same print but have been annealed, which, according to my research, should significantly reduce creeping.

Measuring the length of the creep-springs on the wall
Annealing is a process where you place your parts in an oven at high temperatures, which helps reduce internal stresses and, in the case of semi-crystalline materials, promotes more crystallization. This often significantly improves properties like temperature resistance. PLA improves its temperature resistance up to 170 °C this way - with some caveats. Nylons also belong to the same group of semi-crystalline materials. Although more and more suppliers mention this process in their datasheets, I know very few people who actually use it regularly when printing Polyamide parts because it’s an extra step that doesn’t seem necessary at first glance. The annealing parameters can vary depending on the supplier and you should check the datasheets but in case of my Sunlu materials, I annealed them for 8h at 110°C within my FilaDryer E2. Especially, Carbon Fiber Nylons are already very strong, stiff, and even temperature resistant right after printing, so let’s see if this step changes properties and especially reduce creep.

Annealed (right) and as-printed PA6-CF part
But let’s talk about printing Polyamide. Although this material is one of the strongest and toughest materials commonly used in 3D printing, printing it isn't very difficult. Or let me correct myself—regular polyamide can be difficult to print because it tends to warp quite a bit, but once you add fibers, whether glass or carbon fibers, it basically prints like PLA. These fibers prevent the material from warping and lifting during the print, and larger parts usually aren't a problem. By the way, I donÄt know if you have noticed but many of the fancy materials like PEEK or PPS often come with carbon fibers added. This is not primarily for strength but to make them way easier printable, because this additive severely reduces warping. But back to the Nylon. An enclosure with a heated chamber helps reduce warping a bit more and even improve layer adhesion but it also prints flawlessly on open machines - just make sure your printer can reach around 280°C nozzle temperature and has a hardened steel nozzle because the fibers will otherwise eat up your nozzle in no time! The prints stuck very well to the PEI sheets that I covered with a bit of VisionMiner Nano Polymer Adhesive and everything came out very clean with a slightly rough but shiny surface.

Removing the PA6-CF print from the bed
The fibers not only help during printing but also make annealing the parts much easier. If you’ve ever tried annealing PLA, you may have noticed that the parts warp terribly during the process. They usually shrink in XY and expand in the Z direction because of the stresses that release. When annealing fiber-reinforced materials, there is almost no warping. While the PLA part warped by over 10%, my PA6 and PA12 parts deformed by less than 0.5%, which is usually invisible on normal parts. Only my creep testing springs showed more warping due to their shape, and were the only parts where you could see it with your bare eyes.

Annealed (right) and as-printed PLA parts
Printing nice parts is only part of the story, so to figure out where we can really use them, let’s test the PA6 and PA12 I got from SUNLU! We’ll test horizontal and vertical tensile samples, a bending bar to evaluate stiffness, notched coupons for impact testing, and we’ll also look at temperature resistance.
Let’s start with the most impressive thing you usually notice when you print your first carbon fiber Nylon parts. And that’s the stiffness of this material, which you can already hear because they produce an almost a metallic sound. I loaded the samples one after another into a 3-point bending rig, where I applied load in three steps while tracking the deflection in the middle with a dial indicator. Making sense of these values is always challenging, but you probably know how PLA feels, which is one of the stiffer 3D printing filaments. So I began with this. PLA flexed around 1.2 mm under the load of three weights. Nylon itself is relatively soft, but the carbon fibers make it significantly stiffer. SUNLUs CF-PA12 bent slightly less under the load, with a final deformation of 1.15 mm. Less deformation, by the way, means it’s stiffer. The point where it becomes truly impressive is when we test the Carbon Fiber PA6. It only flexed by 0.7 mm, making it almost twice as rigid as the previous two samples.
Bending Test Setup
However, many users of Nylon 3D prints make a big mistake right here. If you’re using trimmer line, check the label or manual next time. It’s also made from Nylon and most likely, they will recommend soaking the spool in water beforehand to improve its durability. This suggests that moisture alters the material's properties. When printing with Nylon, the filament must be completely dry, and the print itself, as a consequence, will also be perfectly dry. However, once taken out of the printer, it will gradually absorb moisture, which can change its properties—something many people often overlook.
But how much effect does this actually have? To find out, I didn’t only test the samples right from the printer but prepared three different conditions: First, as printed, freshly from the print bed, which is what we just saw in the bending test. Then, I conditioned the samples which means I loaded them with water. Outside, this can take weeks. To speed up this process you can soak the parts in water, which in my experience can be a bit much so I only put the samples into a box with a cup of saturated table salt solution. This ensures that the moisture level stays steady around 75%. I then put everything in a 35°C oven to speed up the process. After spending 3 days in this humid environment, I removed them from the box and let them equilibrate for at least a day before testing. This resulted in PA6 samples having a moisture level of about 3%, and PA12 samples around 0.7%. Since annealing is a major topic with PA, I also conditioned a set of coupons that I annealed before conditioning.

PA6-CF Conditioning
Let’s revisit the bending stiffness. PA12 didn’t seem much affected by moisture, as its bending stiffness remained mostly within measurement tolerance. The annealed and conditioned samples only became slightly stiffer, likely due to the higher degree of crystallinity from annealing. However, PA6 is where it became interesting. The printed and conditioned part reduced its stiffness to nearly only one-third. The freshly printed sample was the stiffest, only flexing 0.7 mm, while the moisture-conditioned part bent almost 2 mm under the same load. This is very significant and often overlooked. Annealing the part reduced the moisture’s effect somewhat, but it still retained only 41% of the stiffness of the reference. Was this something you were aware of?

Bending Test Results
The results were quite similar when I tested the tensile strength. The freshly printed PA12 started with an impressive breaking strength of almost 120 MPa, meaning this small sample can hold nearly 90 kg of load. The effect of moisture conditioning was slightly higher here, but still not very significant. Parts without annealing lost 15% of their strength, and annealing the parts before conditioning improved the results somewhat, but those parts still lost about 10% of their strength. On the other hand, Nylon 6 showed a much greater effect. Prints directly from the bed had a strength of 140 MPa and even failed at a secondary point because the part split, so the actual strength should be even higher. Sunlu claims 170 MPa in their datasheet, which shouldn’t be too far off. To put this into perspective, this is 2 to 3 times stronger than many other common polymers we typically 3D print! However, as we saw with stiffness, you won’t have this level of strength for very long if you’re not in a desert environment. Once CF PA6 absorbs moisture, its strength drops to just 56% of the dry sample, even lower than conditioned Nylon 12. Annealing only slightly helps, and the heat-treated and conditioned parts are only marginally stronger.

Tensile Test Results (XY)
A quick look at layer adhesion shows the same trend, where it is barely affected on PA12 but again, significantly reduced on Nylon 6. The relative level might seem concerning, but you have to consider that the carbon fiber only re-inforces the parts on the printing plane, so XY, and doesn’t reinforce the layers and the absolute levels are in a range of other regular materials. Nylon is typically known for pretty good layer adhesion, and all of the parts I printed also felt strong in between the layers.

Tensile Test Results (Z)
But moisture doesn’t only have negative effects on Nylon. Water acts as a plasticizer in polyamide, so even though it makes the plastic less strong and rigid, it also makes it much tougher. My dry PA6 samples still absorbed 15% of the impact hammer's energy, making them tougher than typical PLA or PETG. However, this impact strength more than tripled after I moisture-conditioned the Nylon6. It absorbed over 50% of the hammer's energy, making it as tough as other polycarbonates, and that even with fibers which usually make parts more brittle. PA12 was less affected by humidity; its impact strength increased slightly when conditioned, but it didn’t reach the toughness level of PA6.

Impact Test
So, before we look at the impressive temperature resistance of the two most common Carbon Fiber Nylon filaments, let’s look at the results of our creep experiments. The bolt test ran for a week, and almost every day, I was able to re-tighten the bolts on the un-annealed PA6 sample, which is exactly teh problem I had on my VORON Zero. PA12 fared much better, and I only could to re-tighten it once after half a week, at a level similar to regular PLA and ASA. Interestingly, the PLA+ also appeared to show creep behavior. I kind of expected that because I have coat hangers at home where those printed from normal PLA still look perfect after years, but most of the ones made from modified PLA are deformed. The question is whether annealing the Nylon was able to reduce or better eliminate creeping. For PA6, heat treating made a huge difference. Even though I was able to re-torque the screws slightly twice, the overall level of deformation was greatly reduced, bringing it nearly to the level of other polymers. Annealing Nylon12 didn’t make much of a difference, and both samples ultimately showed similar permanent deformation.

Bolt Creep Test
The spring test was also interesting. Remember, these parts are only loaded to 25% of their tensile strength, so far below what they are actually capable of holding! First of all, all four springs, whether annealed or not, showed an increase in length over time. As before, Nylon 6 exhibited the most creep. The PA12 samples came next, and the annealed PA6 actually showed the lowest values, proving the importance of annealing PA6 parts. Because I was curious how other materials behaved, I also last minute put a regular PLA sample to the test. To my surprise this one showed even more creep deformation over the first three days, something that I would not have expected at only 25% load level and with the results from before but this spring is a different loading condition than the blocks test that I did! I’m seriously considering now doing this with a wider range of materials so I have comparison value. What do you think? Still I’m also not very satisfied with the spring samples themselves because they test creep under bending rather than tension and due to the bending nature only slight deviations in geometry can have a major impact on stresses. The creep deformation, by the way, is not entirely permanent; within the first 48 hours the parts partly shrunk again, yet still left me with a residual deformation.

Spring Creep Test
And with that out of the way, let’s finally take a quick look at the temperature resistance of PA6 and PA12, which is an area where these materials really stand out. I loaded a regular as well as the annealed sample of each filament into my test oven and slowly increased the temperature at a rate of 2 °C/min. The temperature was monitored by two thermocouples, and I placed a nut as a simple weight in the middle of the bars. For quite a while, nothing much happened as the temperature continued to rise. At 160°C, the PA12 samples softened and finally failed at 170°C. The PA6 samples proved even more durable, showing the first signs of deformation at 195°C and failing at 205°C. Both annealed and unannealed samples failed at similar temperatures ,and the difference was probably only due to the unevenness of the temperature within the oven, so annealing at least SUNLUs PA materials doesn’t seem to significantly improve temperature resistance, but it’s already at an impressive level!

Samples in the Oven
And I think this nicely concludes this in-depth look at the two most common carbon fiber nylon filaments on the market and where they really shine and where their weaknesses are. PA6 and PA12 are strong, tough, and probably among the outstanding factors why you might choose them, show tremendous temperature resistance! Nylon is pretty inexpensive, and you can get a kilo spool of it for as little as $50. Thanks to the carbon fiber content, it’s really easy to print even on regular printers, if you use a hardened nozzle. These fibers also allow you to anneal the parts with minimal warping, especially helping you deal with creep that PA6 is prone to. The other thing to be aware of is the significant change in properties due to moisture. Expect that your parts will change properties after being outside for a while, so if you don’t want to get surprised, condition them. To sum it up - use PA6 if you need maximum temperature resistance and toughness when can handle the moisture sensitivity. In my opinion, annealing PA6 is a must and then also shows only little creep! PA12 on the other hand is the easier-to-handle and more predictable material of the two. It’s still tough, strong and fairly temperature resistant, but far less sensitive to moisture, though it is usually a bit more expensive. Still, both materials really shine when you know how and where to use them properly. Would I print another VORON ZERO in Carbon Fiber Nylon today once I realized that I had to anneal the parts? Probably not, because the tremendous stiffness I wanted to utilize is still gone once they saturate with water and I don’t need 200°C temperature resistance and high impact strength. For the parts that are under constant load I would rather use fiber reinforced materials like ASA or Polycarbonate because they are less moisture sensitive, but Nylon could still find good use in a cooling shroud, for example. There is no perfect material. It’s always a compromise between printability, cost and properties and no material is perfect in every category but when you learn how different materials perform you can choose the right one for your application and I hope with this video I was able to help you understand Nylons a little better! If so, feel free to leave a like and subscribe to the channel if you haven’t already!