Annealing 3D prints in Plaster
For ages, I’ve been looking for the holy grail of 3D printing, and this is for me, getting 3D prints with a strength similar to injection molded parts. 3D printed materials can be really strong, but most of them show only 50% or less strength if they are loaded perpendicular to the layers. In the past, I tried a couple of methods to improve layer adhesion or fuse the layers together post-printing. Even though some helped a little, none of them showed a significant difference. A couple of tests involved annealing the parts, simply in an oven, submerged in sand or even ABS, internally reinforced with polycarbonate. Annealing usually involves dimensional changes of the parts from either sagging because the prints become soft or the reduction of internal stresses or crystallization. In the comments under one particular video, viewers wanted me to anneal my parts in plaster to minimize warping and even using the closed cast as a mold in which I can re-melt the printed part and fuse the layers together. So this is what I’ve finally been working on. If you have performed tests with those or similar techniques, please let us know down in the comments!

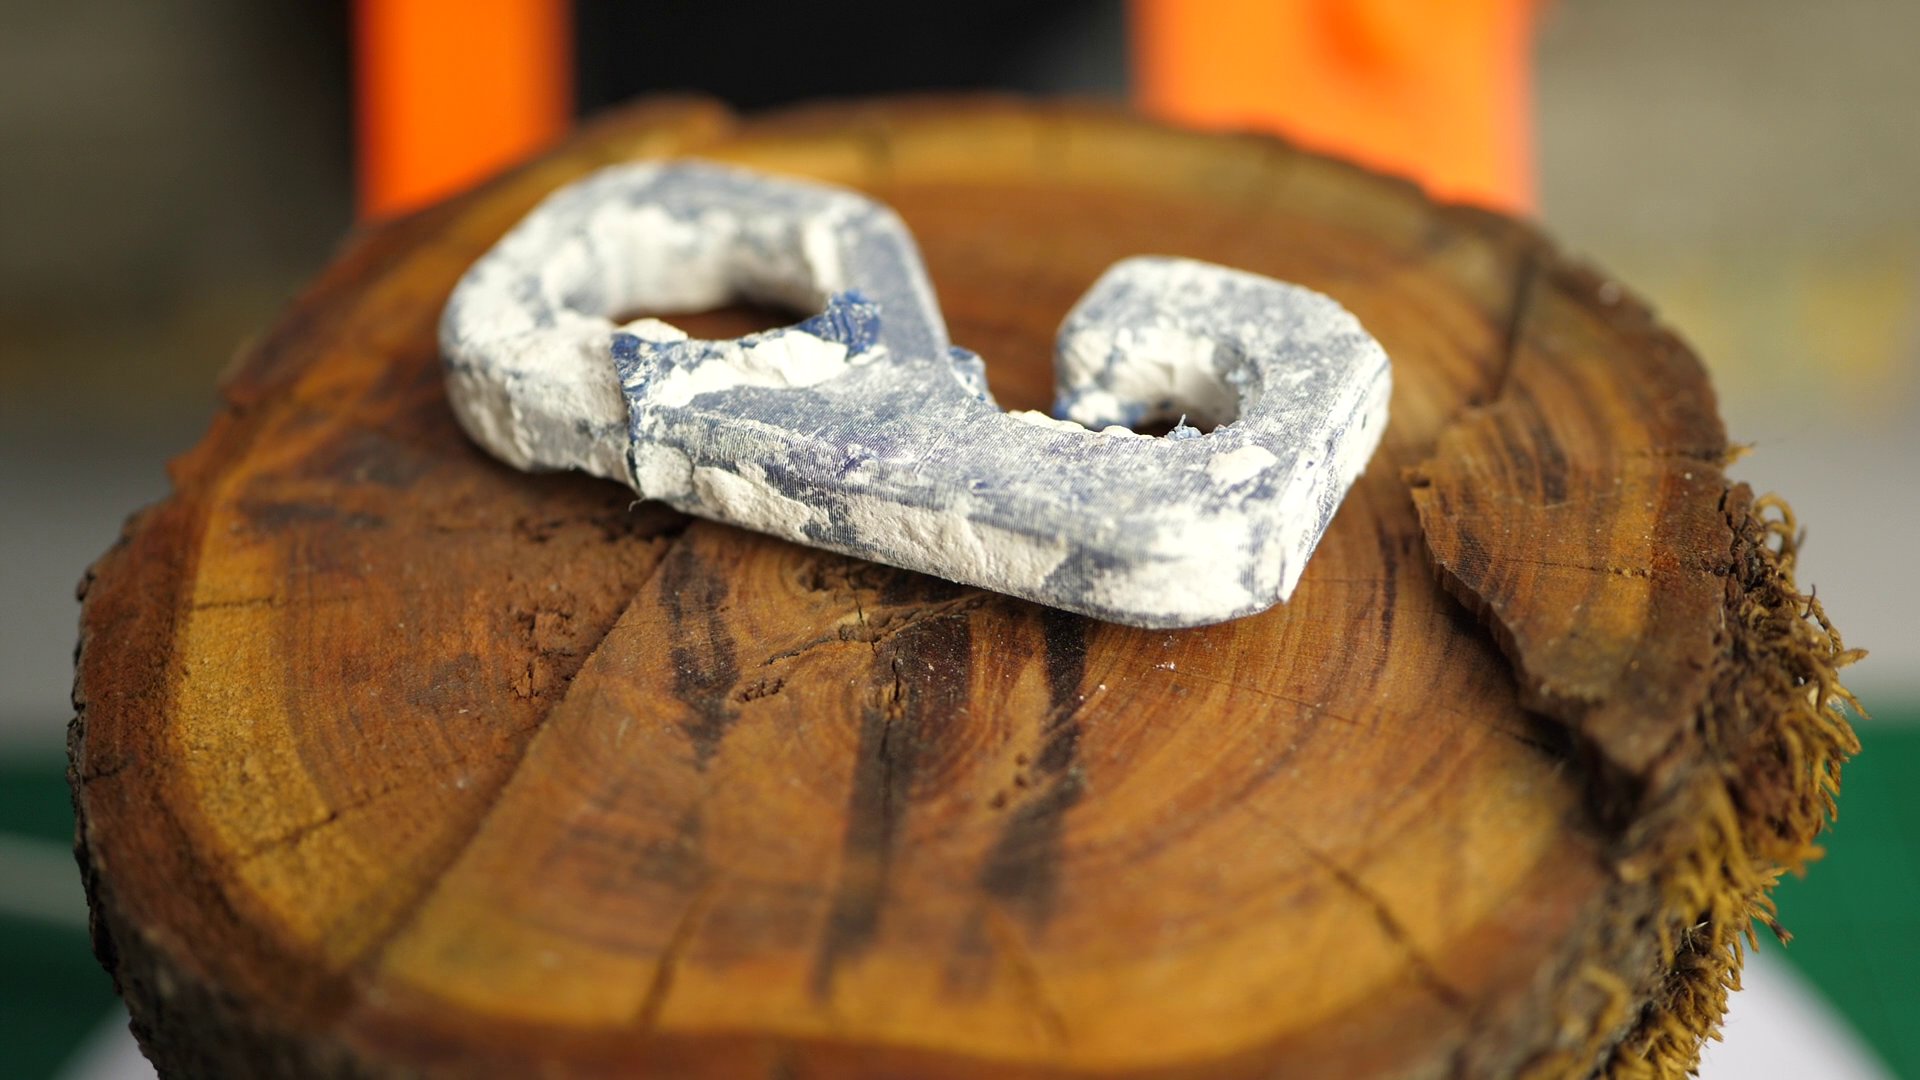
Typical annealing deformations of PLA (left: as printed, right: annealed)
In the past, I mostly did these tests with PLA, because that’s still my most favorite material. This time though, I’ve also included PETG, to see if this polymer behaves differently (PETG and PLA were purchased from DasFilament). And as a small spoiler; this was actually a great idea. I printed a bunch of samples, put them into plaster, dried and then anneal them to finally test them for their layer adhesion and compare the values to the untreated samples. Basically, all of the test samples were printed in a standing orientation, so that we later can test the layer adhesion. I still printed a couple of lying ones to have these test values as the ideal reference. I printed most of the parts 100% dense, because if we really re-melt the plastic, this is the only way the material can’t flow away. Still, I also printed one testhook in both materials with just 2 perimeters and 20% infill to see what amount of deformation we’d really see.
For embedding, I used regular Plaster of Paris from the hardware store. I mixed small batches, one after the other, submerged the parts and then put everything into my vacuum chamber because I tried to remove the bubbles. In hindsight, this probably wasn’t the best idea because somehow the vacuum caused the plaster and the water to separate again, making the mixture really hard. For the later casts, I didn’t use the chamber anymore and made the mixture noticeably more liquid, so that the bubbles rise to the top on their own more quickly. Keep in mind that the working time with plaster is only a couple of minutes until it starts setting, so work quickly. Larger quantities can sometimes also be a problem because the mixture significantly warms up during curing and might, in that state already mess with the polymer.

Plaster bubbling up in the vacuum
A day later, I removed the plaster from the cups to dry it. Drying everything before annealing is very important. Not only would the water start boiling and crack the material, but the water will also cause hydrolysis in the 3D printing material and make it brittle. I made some pre-tests and noticed that it can be hard and time-consuming to dry the parts in the annealing oven, so I instead put them into my food dehydrator at around 50°C. Because it’s hard to judge from the outside, if the plaster is dry, I weight the samples regularly until the weight didn’t significantly change any more. Altogether, they were in the dehydrator for around 36h. Still, after performing all of these tests, I should have probably left them in there even longer, since not only was the plaster wet but also the polymer absorbed moisture.

Plaster cylinders in the dehydrator
Next, I finally put the cylinders into my lab oven, raised the temperature first to 100°C, and then continued all the way to 200°C. After around 3 hours at the maximum temperature, I turned off the oven and left the parts in there for a night to cool down. The plaster cylinders didn’t look significantly different; only one showed a slight crack.

Plaster cylinders in the lab oven
Next came the first exciting part, and that was removing the plaster from the samples. If you didn’t know, by hydrating, so mixing our Paster of Paris with water, we turned it into hard gypsum. The heating process in the annealing oven, more precisely, temperatures over 150°C, turned it back into plaster, which should help us remove the remains from our 3D printed parts. I know from lost PLA casting that the plaster mold quickly crumbles away from the metal when putting it in water, so this is what I went with for the first two cylinders. I used proper gloves because I had the feeling that the solution was quite irritant to my skin. Unfortunately, it turned out that the material was way harder to remove than anticipated, and I wasn’t able to remove everything properly because also keep in mind, that everything that touches water will turn back into gypsum in not-time.
Part after the plaster annealing - plaster residues hard to remove upon contact with water
I even wasn’t able to remove the PLA tensile specimens in one piece because they already snapped in the mold. So with the other two plaster cylinders, I first crumbled away most of the material and then removed the last remaining bits under running water with a brush and that worked way better!

Part after the plaster annealing, with most of the material removed before water contact
What we’re able to see is that the PETG definitely melted because at the hooks, some of the material flowed into the airbubbles I wasn’t able to remove and the hollow hook also collapsed. The PLA parts, on the other hand, didn’t look that affected. Even the hollow part still had its initial shape. Though there were some spots where the material filled some bubbles, so the material definitely got soft, though probably not as much as the PETG. This is probably due to the slow heating in the mold, where PLA increases it’s degree of crystallinity by a lot and therefore gets heat resistant up to almost 200°C, which I’ll show you in a bit. PETG doesn’t show that crystallization effect, why it doesn’t get more heat resistant during annealing.
But now, let’s see how the strength of the material really changed. I tested all samples on my DIY universal test machine to increase repeatability. Let’s start with the reference hooks that were not treated in any way. First, the ones printed standing to judge layer adhesion. The PLA ones failed on average at 69kg of load, PETG was significantly weaker and failed at only 36kg. In their ideal, lying printing orientation, they are, of course, significantly stronger, and PETG failed at 106kg, PLA even at a whopping 119kg. If our re-melting in plaster works ideally, I would be hoping to get close to those numbers as well.

Reference hooks - as printed
So let’s test that out and start with PLA. The hooks that I annealed in plaster failed similarly to the untreated ones, right through the layers. Sadly, also the average strength was over 30% lower than before, so here, not fusing of layer happed. But let’s get to PETG and oh boy, those results were more than impressive. The parts didn’t snap through the layers but either violently ripped, or even yielded, what never happens with those standing hooks. The final average strength was right at 100kg, so only slightly lower than the ideally printed ones and almost three times as strong as before! PLA was disappointing but PETG seems to have worked just as we hoped that it would! The hollow hooks showed similar results with the PLA hooks becoming weaker, but even the deformed PETG hook, doubled it’s strength!

Strength Test results of PETG
Let’s also quickly take a look at some standard tensile specimens. I couldn’t test PLA because they already broke in the mold. The PETG parts didn’t show such a significant improvement in strength but still managed to increase their strength from 30 to 41MPa. And again, the upright printed samples yielded and necked, which really never happens with normal samples. Impressive!

Plaster annealed PETG part necking during the tensile test
We didn’t reach the strength of the parts that were printed flat with 53MPa, maybe because the reference section was too small or due to the rough surface, still a very significant improvement in strength that also confirms that this method really works!

Mini-tensile specimen test results
If we also take a look at the fracture surfaces, we can see some bubbles at the re-melted parts, maybe because we didn’t dry the plaster cylinders enough before the annealing step. This might be additionally detrimental because PETG tends to hydrolise when wet, making the parts more brittle. So I think there is still room for improvement.
PLA was, like in previous annealing tests, a little disappointing in terms of strength. You could argue that we didn’t properly melt it like the PETG and that’s true. Though in my pre-tests, I did raise the temperatures and got it to melt but ended up with just a brittle mess in the mold. Still, with a more fine-tuned process, we might even be able to achieve our goal here. But, what’s not disappointing with PLA is that using this plaster annealing process, we were able to heat-treat the parts without any warping. Due to the increased crystallinity, those parts are now able to withstand excessive amounts of heat. In some cases, this might be more interesting for you than pure strength! To demonstrate that, I placed an as-built and annealed part on an aluminum sheet in my oven and added a weight. The untreated part already failed right around the 60°C level, whereas the plaster annealed one, even in its hollow form, was still strong at 170°C. I didn’t go any further because I was just about to bake some yeast bread and wanted to avoid any plastic taste in it. I hope you can understand! After the test in the oven, the as-built hook showed the typical deformation signs; the plaster-annealed one looked just like before.

“As printed” (deformed) and Plaster Annealed samples after temperature test @170°C
So yeah, I’m utterly impressed by these results, and I still think there is room to improve the process further. I think this is seriously a huge step towards using 3D prints in really demanding applications, though currently, it still requires quite a substantial amount of post-processing work. What do you think about the results and what are your ideas to make it better? Leave a comment down below!