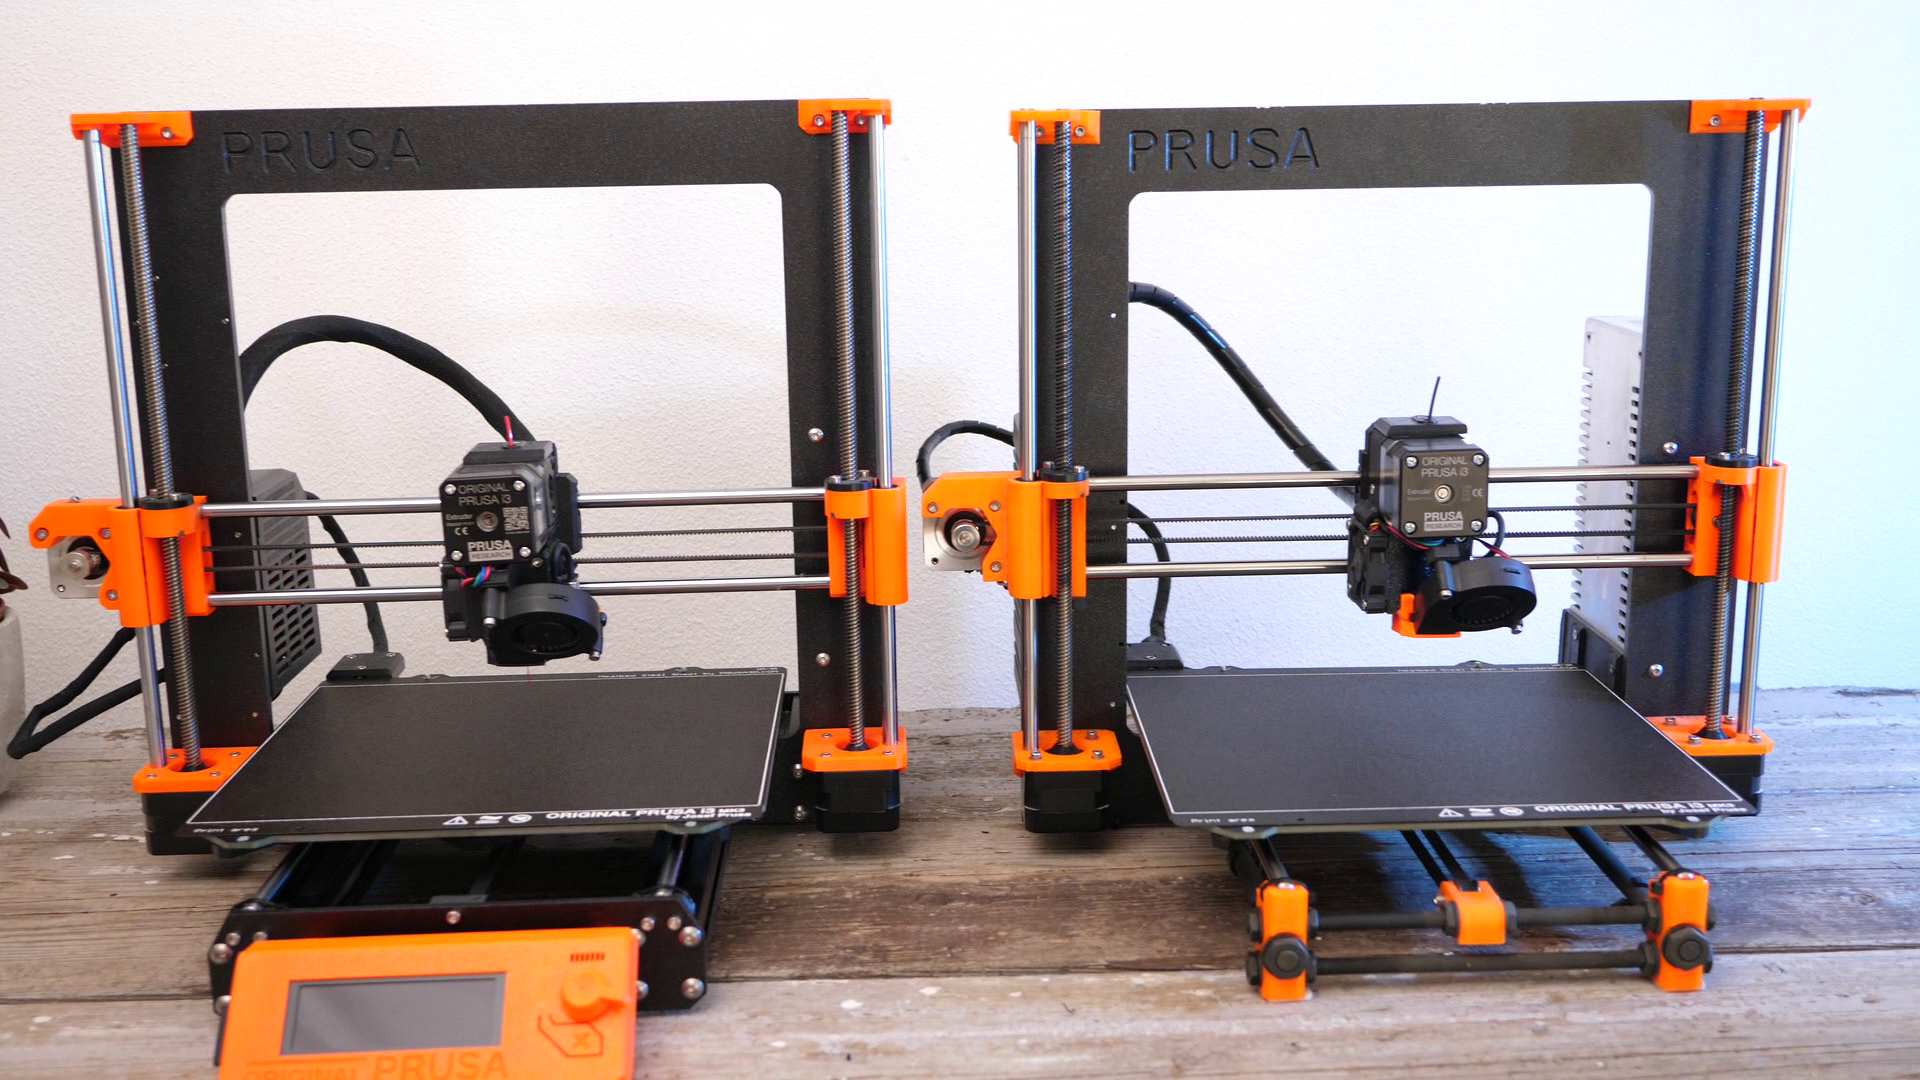
Prusa MK2.5S DUET 3 Mini 5+ conversion
This was the first Prusa I ever bought almost 5 years back, and that has probably done more than 10000 printing hours with hardly any problems during that time. Unfortunately, last fall, the first magic smoke escaped its electronics housing, and that was when the power connector of the heated bed melted. At that point, I was able to just replace it with a new one, but only a couple of weeks later, the machine greeted me again with a nasty smell and another bed heating error. After looking at the electronics, I realized that it was even worse than last time because both power input connectors melted right in their socket. Hence, the terminal blocks were not salvageable anymore. I could have de-soldered them, but I thought I save myself the hassle and put a new board in it because I need a reliable machine and not one where every bunch of weeks, something breaks. A new Rambo Mini with at least 5-year-old technology, which would have been the easiest option, would have cost me almost 100€, so I thought about alternatives.

Melted Bed Wire of my Prusa MK2.5S
My E3D Toolchanger is using a DUET 2 mainboard which I really enjoy using. Unlike most other control boards out in the wild, it’s not using Marlin but RepRap firmware, which you primarily find on DUET boards. The thing I really enjoy about RepRap firmware is that you don’t have to compile and flash your own firmware. Everything on the DUET boards gets configured via GCODES, which makes changing settings that would on a Marlin-based system require recompiling so accessible. The other thing is the web interface. Basically, all new DUET boards either have ethernet or WiFi connectivity which is used to access DUET web control that’s directly running on the mainboard, so no additional single board computer, power supply and WiFi dongle are necessary. Compared to Octoprint, it lacks a huge amount of plugins but is way more stable and quicker to use and ever works great on phones from all of my experience. Unfortunately, the recent DUET 3 is 260€, which is more than some new printers cost and is way overpowered for what I needed on my Prusa. Fortunately, DUET finally released a specked-down version of it, called the Duet 3 Mini 5+. This is the successor to the old Maestro boards and primarily aimed towards 3D printers. Even though it’s not as powerful as its big brother, it’s, in my opinion, a perfect solution for 95% of all printers out there. It features quality components, five stepper motor channels, and uses TMC2209 drivers. It has a fast 32 bit ARM processor and enough IO, PWM, and thermistor channels for most projects. It still costs 99 pounds, but its integrated web interface saves you from buying an additional Raspberry Pi and PowerSupply for running Octoprint.

If you are interested in RapRap Firmware in general, there also recently popped up a port for STM32 and LPC processors. To try that out, I already got a Mellow FLY board which looks very much like a cheaper version of a DUET.

MELLOW FLY RRF-E3
Let’s continue with my broken Prusa MK2.5, but you can also use this as a guideline to fit a DUET 3 Mini board into most other machines. There is also already a guide for the popular ENDER 3 available. Since the DUET 3 Mini board is quite a bit bigger than the Rambo Mini, I had to make a new electronics enclosure. Fortunately, there is a DUET version of the CARIBOU printer, which is a modified version of the Prusa MK3. Since their design is available on GitHub, I loaded the STP file into Fusion 360 and modified it in a way that it fits the DUET 3 Mini instead of the DUET 2 and also had to modify the mounting points so that I can screw it to my aluminum frame instead of the extrusion gantry of the CARIBOU. I also increased the box’s thickness because I always hated the cramped electronics compartment of my old Prusa and finally, also added a hole for the WiFi antenna for perfect reception.
Next came wiring, and for that, it’s basically a must to own a crimping tool. I also don’t have a very expensive one, but it does its job very well. The board comes with a complete set of crimp terminals to add suitable plugs to the end of the existing wires because the ones on the Prusa didn’t always fit the new board. Now, let’s get back to wiring! I snipped off the old plugs, stripped off a bit of insulation, placed the crimp connector in the tool, inserted the wire, and crimped everything together. It might be a bit tedious initially, but it’s a very satisfying procedure as soon as you get a hold of it. I had to learn that placing the connector into the tool at first makes the work much easier. I also noticed that I had to painstakingly pay attention that the first crimp only squeezes the wire’s insulation part and the second one must only wrap around the wire core itself!

My Prusa MK2 still runs on 12V, so there is quite some amperage going through the wires. I, therefore, terminated the existing double power-in cables into single cable lugs. Probably not a perfect solution, but the wires seem to be appropriately crimped in there. This is kind of important because the 1.5mm² cables are only just capable to carry the maximum 20A of the PSU. The bed heater cables are terminated with the same cable lugs. The hotend heater used slightly bigger connectors than the rest of the terminals due to the current requirements. I reused some of the existing plugs that were already on the cables since nothing will move around in the case, so I’m not worried about them not locking into place. I ordered them in a way that the existing cables were long enough. The rest of the wires were all re-crimped so that they matched the proper pinout of the Duet board. I was able to reattach all the existing wires to keep all the old functionality, and all were long enough for the new mainboard, so no soldering was necessary. The only bodge I had to do, was for the Noctua fan because that’s running on 5V instead of the 12V input voltage. Fortunately, the Duet board switches the fans on the negative side so I was able to hook the negative side to the normal fan pin and stole 5V from another unused connector. And that’s it already. I have expected wiring to be way worse, but in the end, that didn’t turn out to be as bad!

Since I’m using the WiFi version of the board, I had to add the SSID and the Password by connecting the board via USB to my laptop and sending the correct GCode command via Pronterface.
Before I started with the configuration itself, I upgraded to the latest firmware, which is as simple as downloading a zip archive from the DUET Github, uploading that using the Web interface, and starting the update.
When you’re doing a completely new configuration where you don’t have any reference data similar to my Prusa DUET project, you can use the RepRapFirmware Configuration Tool. This guides you through the whole setup process, and with the help of the wiring diagram lets you assign most things for your setup. In the end, it’ll generate an archive with all the necessary files required for the initial configuration. You again just upload them via the Web Interface, where they can also be further edited.
Going through the configuration file might be initially overwhelming, but it’s built up totally structured. You define the general setting, assign the drives to the axis, setup the axis and configure limits. Heaters, sensors and fans get set up—everything in simple GCode commands. Just open the Gcode reference on the side and it’s pretty easy to figure out what all of them mean if you need to change a parameter. I’m frank here; I also checked other configuration files for example the ones for the Caribu Duet that helped me figure out the configuration for the PINDA probe with temperature compensation. And this is the great thing about RepRap firmware. Even if you’re new, changing the configuration is as simple as sending a GCode command without any firmware recompiling! I also linked my configuration below if you want to look at it.
Additionally, just browsing through the DUET forum helped me a lot, and basically, all the questions that I had, were already asked several times by others. Also, something neat: the five stepper drivers of the DUET 3 Mini allow Gantry leveling. The leadscrew motors of the z-axis are connected to individual drivers so you can home the printer on the beginning and the end of the x-axis and automatically remove the tilt. This should reduce the amount of mesh bed compensation you need to apply in the end.
What might also be unusual for some are the other .g files that are on the SD card. Rather than having pre-configured procedures for homing, pausing ect, RepRapFirmware does have a separate GCode file for all of these procedures. The standard procedures usually get you starting, but if you specifically want to change order, speed, or locations, those are the files you want to edit. As I said, overwhelming at first, and it also took me a bit of time to get used to it, but in the end, it provides you an outstanding amount of customizability. Also, check what others have done in their setup. Adapt and learn!
I guess you’ve noticed it already, but one, maybe for some, big downside of my mod is that I can’t use the old 2004 LCD with the encoder anymore, so I now have a blunt-nose Prusa. The board does support the slightly more advanced 12864 dot matrix LCDs but what you should really use are the touchscreen PanelDue. Since they cost almost as much as the board itself, I cheaped out just because the web interface works so well, and I also rarely missed a physical screen on my toolchanger. But let me know! Is not having a physical screen a no-go for you, or are you just as happy using the expensive screen that you anyway carry around with yourself all day? Maybe I’ll add a touchscreen in the future. Who knows?
Tuning-wise, I didn’t really have to do a lot to get the same and even higher level of quality and reliability that I had before. I made a copy of the MK3 PrusaSlicer profile and just adjusted the starting GCode a little. I added the DUET board’s IP address to directly send the sliced models to the machine with one click. Quality is excellent that way.

If you’ve watched my previous video, you’ll know that I had z-banding issues due to bang-bang heating but fixed that by switching to PID control. During that endeavor, I also had problems with stutters and blobs that came from a too low PWM frequency. 25Hz solved that. RepRap Firmware uses PressureAdvance instead of Linearadvance, which does basically the same and also tries to compensate for over-and underextrusionions during speed changes. The calibration values are not the same, but I still use the handy Marlin K-factor Calibration Pattern and simply replace the M900 K by M572 D0 S using a text editor.

So, in the end, how happy am I with my Prusa Duet mod? Very! I still have a filament sensor, mesh bed leveling, full PrusaSlicer support, the Noctua fan and even gain automatic gantry leveling; the silent stepper drivers make it way more pleasant in my office and I even now have an integrated and snappy web interface. I maybe might be adding a screen just for the sake of usability, but I haven’t really missed it so far, even though it looks a bit weird in comparison.
Let me know what’s your control board of choice and if you’d consider the DUET 3 Mini for your next project. Is ReprapFirmware something you’re interested in? Supply of the new DUET is still not the best, so check the official resellers.
Further links
DUET 3 Mini 5+ Resellers: https://www.duet3d.com/GenuineResellers
My PrusaDUET configuration: https://github.com/CNCKitchen/PrusaDUET
PrusaSlicer 2.3 configuration
Mellow Fly RRF Board (affiliate): https://s.click.aliexpress.com/e/_AEogjA
LPC/STM32F4 Port of RepRapFirmware v3: https://github.com/gloomyandy/RepRapFirmware
Marlin k-factor calibration tool: https://marlinfw.org/tools/lin_advance/k-factor.html