MEKANIKA EVO CNC Router REVIEW
The Mekanika EVO is not my first CNC router. One of the reasons why this channel exists is actually a wooden CNC router I built more than 8 years back. I later upgraded to an aluminum framed machine, and now Mekanika sent me their latest CNC router for this review. As a disclaimer – Mekanika sent me the machine free of charge, but they didn’t influence the review process in any way. Mekanika is not new to the CNC Market, and they have been selling their Mekanika Pro routers since 2019, as well as a screen printing device. The EVO, which we’ll be taking a look at today, was financed right around a year ago in a, in my opinion, very legitimate Kickstarter campaign and has shipped all of the machines from the campaign until the end of last year. The EVO builds on the design of their Pro machines and primarily is a more affordable option with simpler motion components. It comes in three different sizes from the S that has a working area of 600x600mm and costs 2700€ excluding tax to the L that can machine parts with the size of one meter by one meter and costs 4000€. The missing tax in their shop already shows that this machine is aimed more towards businesses. It’s definitely not cheap but still in a similar price range as comparable machines on the market and with that target group. I – heavy-hearted – chose the smallest version of the three simply because I didn’t have the space for a bigger one. The name EVO by the way, comes from the possibility to upgrade the machine to a Pro version with an upgrade kit. Mekanika said that this would be available at the end of last year, but I haven’t seen anything in their store yet.

Mekanika EVO upgradability (Source: Mekanika EVO Kickstarter)
My machine got shipped from Belgium and as far as I’ve seen, it only ships withing Europe. It arrived on a palette with a bunch of boxes containing the aluminum extrusions, electronics, and accessories. Everything was nicely packed in labeled bags and included everything to build the router and machine the first parts. Unfortunately, my kit was missing the mount for the spindle, but within a couple of days, they shipped a replacement. Everything else was there, with even some spare parts that are either easy to lose or might need to be replaced at some point. Something else that I, unfortunately, don’t always see with other machines was the certificate of conformity, which ensures that the machine complies with certain regulations and might be a requirement to even use it legally in companies or educational facilities.

CNC Router Kit still in boxes
The assembly process was pretty straightforward, and an hour-long video with English text prompts guided me well through the process. Since I didn’t do the whole assembly in one run and filmed some bits from time to time, it took me around five hours to fully assemble the machine. Most of the steps are explained very clearly and make building the machine a breeze even for beginners.

Video assembly instructions
Still, sometimes I wished for an assembly or explosion drawing because sometimes even I was not 100% sure on which side and in which orientation I had to mount parts. Especially beginner-friendly is wiring because not only is there no need to work on mains voltage, but all the wires are pre-crimped and come with color-coded plugs. A real nice touch!

Color-coded Cables
You first start with the base frame and then slowly integrate the motion parts and the electronics. The motion system is very similar to what probably many of you know from current 3D printers where V-slot extrusions and rollers with eccentric spacers are used for linear motions – just a bit beefier. I, at first, was a bit worried because that didn’t seem too rigid, but since the EVO uses multiple quality rollers for this setup, it ended up way sturdier than I expected. Some of the v-slot extrusions are even machined, allowing even more smooth and precise movements. The axes are driven by big NEMA23 stepper motors.

NEMA23 Stepper Motor and Z-Leadscrew
Two are on the y-axis, one on the x-axis and one drives the trapezoidal leadscrew used on the z-axis. The longer x and y axes don’t use lead screws but get driven by conventional timing belts. This setup has the benefit that the router can move really fast, and it eliminates backlash but adds a bit of softness into the axes. I mean, this router is primarily designed to machine wood and doesn’t need the stiffness of a metal mill, but it just looks a bit disproportional. As we’ll see in a bit – the design works for its intended application, but there are wider belts available, which would require a different integration but would have made the machine just a bit more rigid. Since the machine uses stepper motors that don’t have any positional feedback, there is a mechanical end stop for each of the axes. This is especially nice for the y-axis. Since the end stop position is adjustable you can very easily and automatically square the gantry that way. As said before, all the wiring and crimping is pre-made, and I just had to route the cables through the cable chains and plug them into the motors and switches and the color-coded connectors into the separate electronics enclosure I placed under my machine. I screwed the big emergency stop button to the front as well as the control panel with the touchscreen. The control panel is basically half a keyboard with custom stickers used for the machine’s general control, like jogging it or typing custom G-Code commands. Then there is a touchscreen next to it which lets you control the rest of the machine. You load your G-Code files via USB, or you can even set up a shared network folder using WiFi connectivity. The interface lets you change settings, watch the job’s progress, or just browse around on the Linux system. That’s all really nice because you don’t need to bring your laptop to the shop and get it all dirty. Even though the touchscreen is not huge, I was able to control most things without big problems, but if you’re not a fan of the touch interface or have thick fingers, you can also just plug in a mouse. The software and hardware running on the EVO is from PlanetCNC, which comes with good documentation if you need to research G-Codes or cycles. All of that is running on a Raspberry Pi that sits in the electronics enclosure together with a 24V power supply, the PlanetCNC control board, and the stepper motor drivers. Nothing on the inside should and needs to be touched, and all the IO is routed to connectors on the outside. Just a quick note here – the stepper motors are powered by default and have a really whiny, high pitch sound, even in idle, which drove me crazy. While you set up your job, you can disable them, but that will lose your homing position and squaring procedure.

Mekanika EVO Electronics
The Mekanika EVO also comes with a tool length probe that is used to reliably and repeatability measure the length of endmills. The crocodile clamp connects to the bit and closes a circuit when it touches the metal target. It is a nice addition, but it actually drove me crazy at some point during the review.

Tool Length Probe
I didn’t know that if clamp and target touch, the machine goes in some kind of a restricted mode and doesn’t move anymore. Since the isolation over the clip slipped during use, it was randomly causing issues that took me a while to figure out and fix. I also modified the target with another wire to use the sensor as a touch probe. This allows me to precisely and automatically find the center of pins or parts, which is super helpful if you do two-sided machining and need a reference.

Touch-Probe to find the center of the pin
The Mekanika EVO ships with an AMB 1050 spindle with 1050W maximum power. It’s air-cooled, making it compact but also quite loud during operation. It has an RPM range between 5000 and 25000, making it usable for metal and wood machining, but I had the impression that the power output is significantly lower at low rpm. I’ve been using the same one for many years on my other routers and have been quite happy with it.

AMB 1050 spindle
The standard kit of the router comes with the spindle that’s controlled manually with a dial wheel. However, if you spend 300€ more, you’ll get one that’s directly connected to the electronics board and therefore can be controlled via G-Code and is also turned off if you push the emergency stop. I find the upgrade price way too high because you can get a completely new digitally controllable spindle for the same price the upgrade costs! (Update #1 22-03-07: The "DI Spindel" upgrade is not only the spindle itself but also includes additional electronics within the electronics box, which makes the €300 price a bit more reasonable but also means that you will not be able to upgrade to the DI Spindle if you purchase the Standard Spindle at first.) The spindle uses custom collets that you can get in a diameter range between 3 and 10 mm and therefore fits a wide range of endmills.

Collets
The stock machine doesn’t come with a machining base, so you can either buy a wasteboard for 200€ with the kit or just go to your local hardware store and get a piece of MDF cut out. Mekanikas waste board comes with the T-nuts and bolts to mount it on the rails as well as a surfacing endmill to machine everything flat and threaded inserts to later mount parts on the base.

Machining the waste board flat
Let’s now talk about the reason why I think that this CNC router might be one of the best solutions for someone who doesn’t have experience with machining. Mekanika did a great job providing easy-to-understand instructions, starting with the assembly video and small things like color-coded cables or a spacer for easy alignment. And it doesn’t stop there. After assembly, even I was happy to have step-by-step instructions on setting up the machine and doing the first cuts. This included a whole calibration guide on how to surface the waste board, drill the hole for the inserts and square the machine. This might sound trivial for the professionals but makes learning how to use such a machine that much easier and quicker. There are several blog posts on different CNC machining topics provided by Mekanika and video tutorials on creating G-Codes with Fusion 360. If you have a CNC router yourself this even might be interesting for you! Mekanika recommends using Fusion 360 as the CAM tool of choice and provides a well-working postprocessor. But since the EVO or better PlanetCNC accepts basically any G-Code, you also have the option to use tools like EstlCAM or, for example, the programs from Vectric that I used a ton when I got into CNC machining.

Mekanikas great learning resources: https://www.mekanika.io/blog/learn-1
During the last two months that I’ve been using the machine, I realized a couple of projects that have been on my list for quiet a while. First, I machined a nice learning tower for my daughter that mounts onto an IKEA stool and which she loves. I did all the design work in Fusion 360 as well as CAM.
Most of this was simple 2.5D machining to cut out the bananas and the outlines. Here I noticed that the motion system with the belts isn’t as stiff as one would like to have because the dimensions of the parts always were a couple of tenths of a mm off. Depending on the machining mode, they were either too small or too big, so I ended up leaving 0.5mm of material on the contours and used a spring pass where I just machined that thin remaining material away to get more exact dimensions.

Learning tower in Dusion360
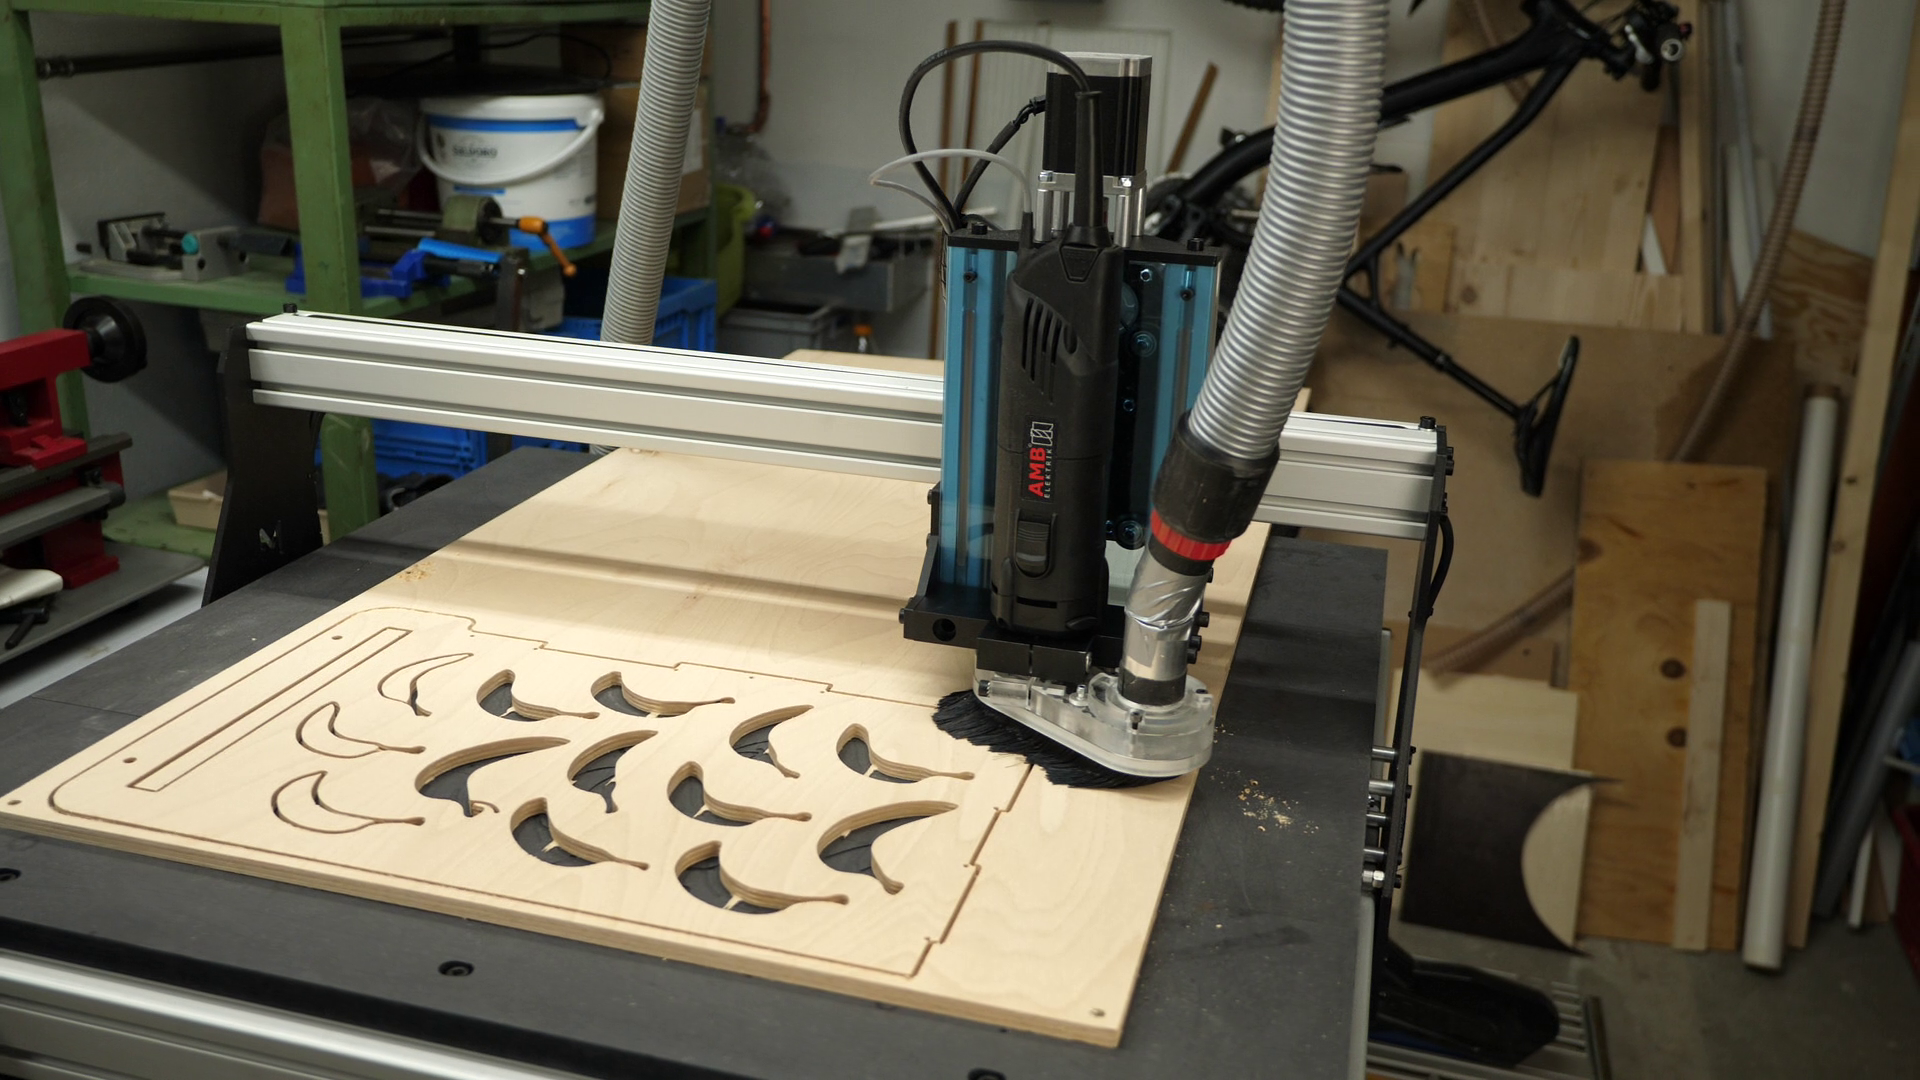
Machining parts of the learning tower
Here I made heavy use of another optional, but in my opinion, a necessary accessory for the router, and that’s the dust shoe which attaches to a vacuum and helps keep the workshop clean, and especially with hardwood like this, reduces dangerous dust to a minimum. Unfortunately, it’s also another 200€, which I find quite a bit in comparison to the price of the whole CNC router. At least it works and is nicely designed with a magnetic quick-swap curtain.

Dust shoe
Next, I machined, I think, my most complex project to date. A friend of mine wanted me to machine an electric guitar body for years, but my old machines just weren’t big enough. The body is more complex than it looks at first glance because it has these angled sections and, most challenging, a 3D chamfer that goes all around the part. Making it even more complex, the body had to be machined from both sides that, of course, had to be aligned to match up. The whole job had 23 operations in the Fusion 360 CAM setup using four different tools and took over 2 hours to machine!

Front machining operations in Fusion 360 CAM
Even though this was only the pinewood test piece, the result looked stunning, and I only had one slight mishap, where the zero position somehow got lost.

Finished front
The final body will be machined from swamp ash wood in a couple of weeks! During cleaning, I spotted another problem with the open belt setup. All the dust and chips that fly around during machining can potentially land on the belts or the rollers and might cause problems in the long run. It was easy to clean but is probably a task that needs to be done after every use.

Machining the guitar body
And of course, I had to try machining some aluminum which worked better than I would have expected. The EVO S nicely chewed through this piece of aluminum at decent speeds and with very nice chips and a good surface finish.
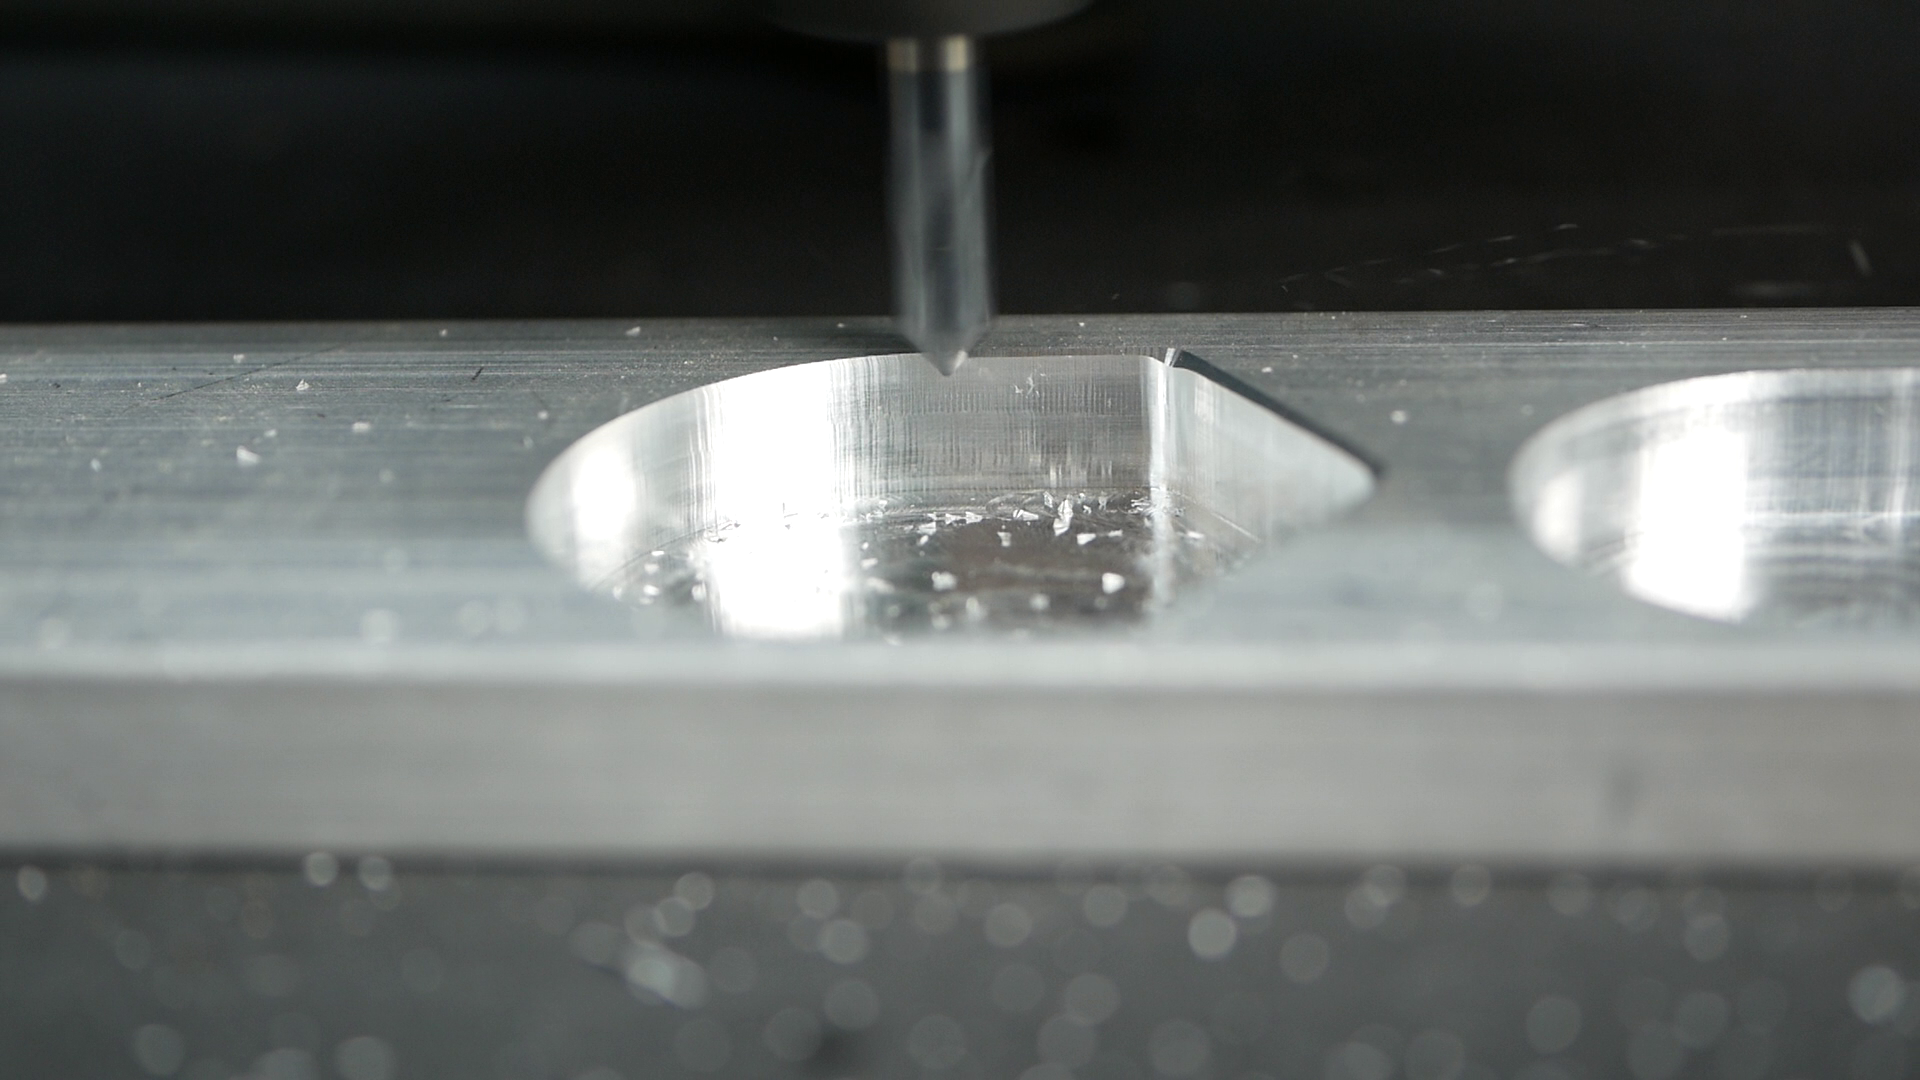

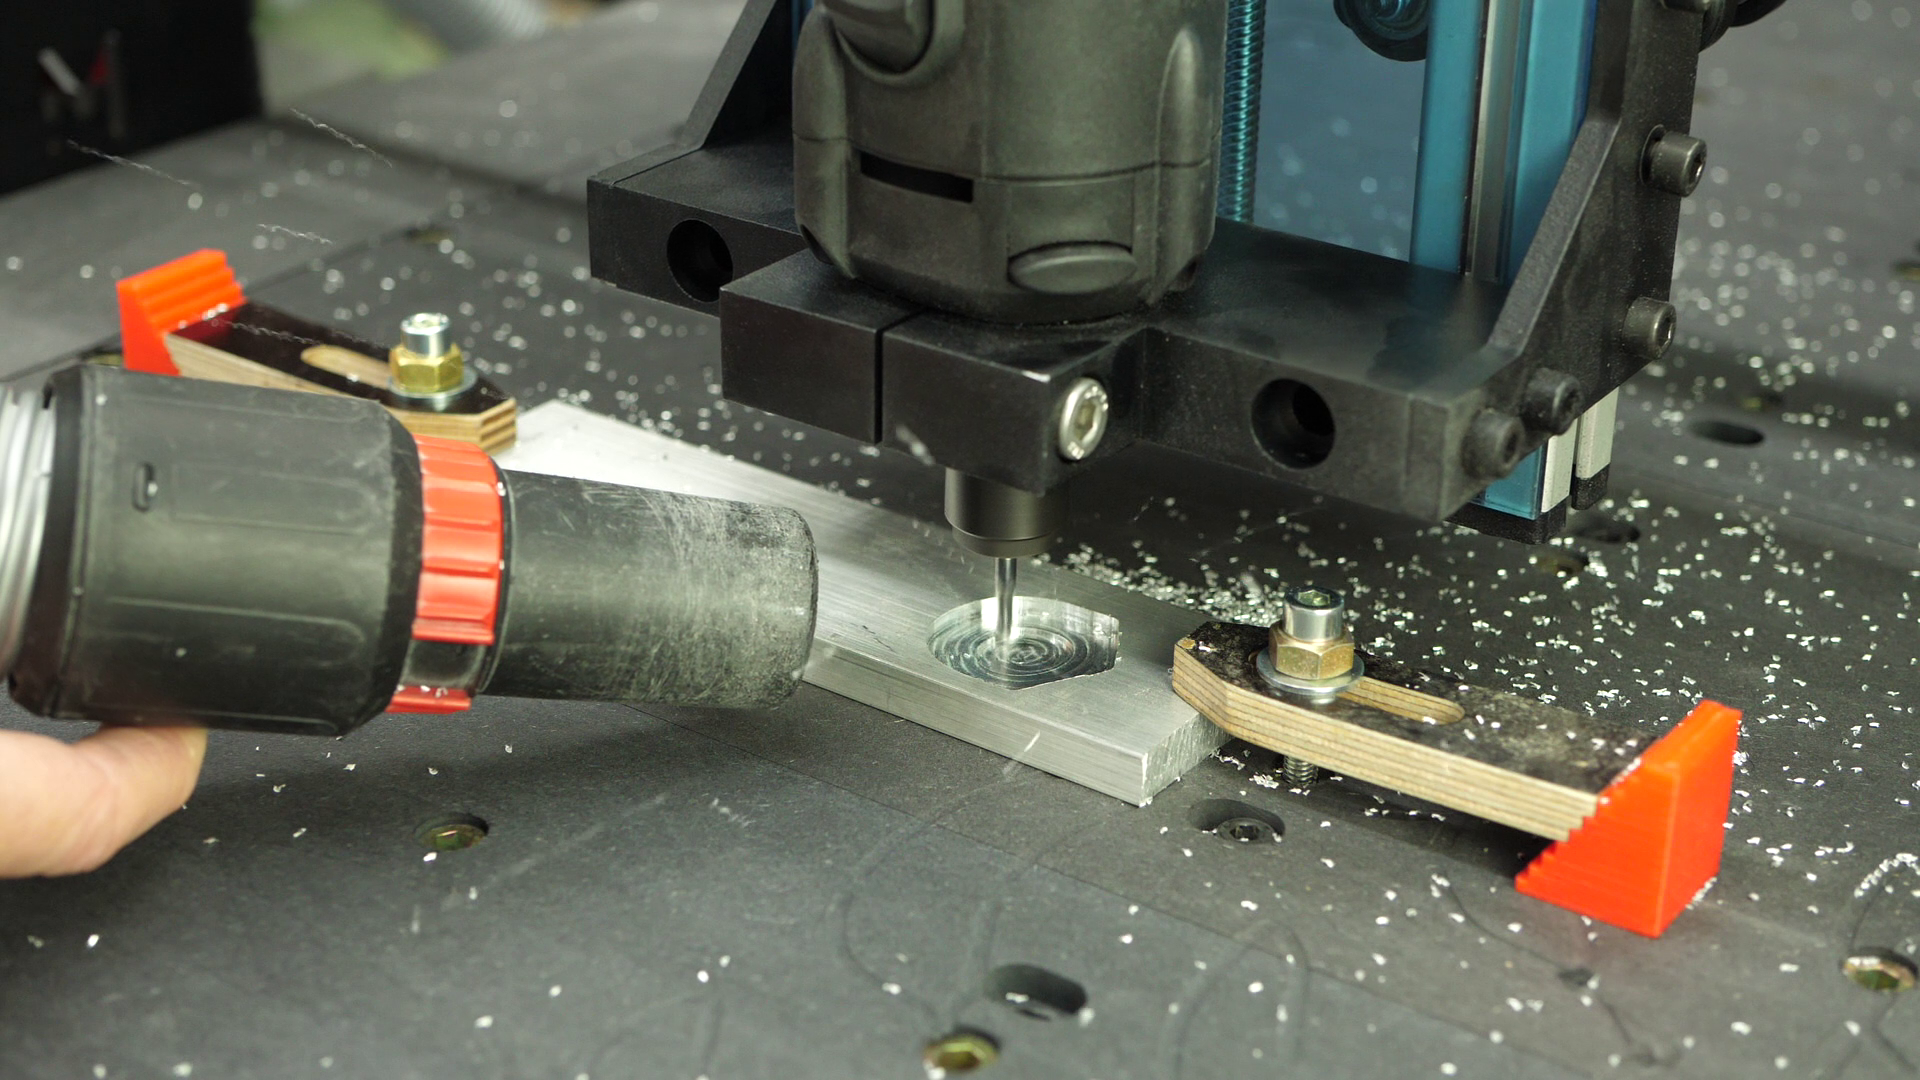
Even though this routers’ main use should be wood and plastics, it can definitely be used for more challenging tasks if you don’t expect the performance of a milling machine. Unfortunately, one of the limiting factors here is not the capability of the EVO but the clearance height on the z-axis. With the waste board, you only have around 70 – 80 mm of clearance which doesn’t allow you to machine thick materials. Honestly, the 40mm of the guitar body was right at the limit of what’s possible, and I couldn’t even go all the way through the material. Mounting a vice, for example, is hardly possible, and the few times I used one to cut open some 3D printers nozzles, I had to remove the waste board and fix the vice directly to the frame.

Vice directly mounted on the frame
Still, in the end, I had a great time with the Mekanika EVO S. I had to get used to the new interface, and the missing part during assembly and mishap of the touch-probe temporarily weren’t motivating. The motion system doesn’t seem to be perfect for the dusty environment, and the belts look a bit thin. Still, the results show that it works, and Mekanika are not the only one who use such an approach. Everything else was super pleasant. The kit is easy to assemble, the wiring is top-notch, and the integrated computer with touchscreen and keypad makes it easy to use and very compact. Where it particularly shines is the guidance that Mekanika gives for everyone who’s not a pro in CNC machining with their tutorials and guides. It’s not cheap at around 3000€ with all the accessories but well worth the money if you want to use this machine as a tool and need something that works and you can rely on. I’m totally honest here. If you find joy in building a CNC router from scratch with self-sourced parts or modifying an existing one, there are way cheaper solutions around that might give you even better results in the end. I think in that case you aren’t the target audience of Mekanika because with its price tag it’s rather for businesses who want to get into CNC machining and where time is money. In such a case you want something that works, is capable, yet easy to use, especially if you’re not experienced. And in such a case the EVO CNC suits very well and should give you a return on investment, soon! If for you the way is the goal, go ahead and build a CNC router yourself, this honestly taught me so many things when I did that back in the day. But what’s your opinion on these semi-professional machine. Do they suit business needs and might they be even suitable for the makers or should you rather spend even more on a router with linear rails and ball screws? Let me know in the comments!

Mekanika EVO-S in my shop
UPDATES 5/4/2024:
- Prices now go from 2500€ to 3250€ (spindle included), making it significantly more accessible than in 2022
- The upgrade kits are available and also significantly cheaper than announced, the prices and information are here: https://www.mekanika.io/fr_BE/shop/m01015-upgrade-kit-evo-pro-4199?category=3#attr=
📖 Further Links & References:
Mekanika EVO Shop: https://www.mekanika.io/r/hfV
Mekanika Guides: https://www.mekanika.io/blog/learn-1
Planet CNC: https://planet-cnc.com/
EstlCAM: https://www.estlcam.de/
Vectric Software: https://www.vectric.com/de/produkte/cut2d-pro
Mekanika EVO Kickstarter: https://www.kickstarter.com/projects/mekanika/evo-the-evolving-cnc-milling-machine