HOW STRONG is PET Bottle Filament?
PET bottles are something I’m sure all of us have at our homes. But did you know that you can quite simply recycle one of these bottles into usable filament without the need for complicated and expensive shredders and extrusion systems? Pull-trusion is a method that I’ve been hearing more and more about of over the last year. Pultrusion means that you take a PET bottle, slice it into a long strip using a simple fixture with a razor blade, and then just pull this tape through a slightly modified 3D printer hotend and get ready to use filament out of it! This process got me pretty excited, and at the end of summer last year, Joshua Tailor sent me a beautiful package with some samples made from different bottles. I highly appreciate his input on this process and permitting me to use some of his footage here.

Assortment of PET filaments from JRT3D
I’m quite sure that I want to dig deeper into this topic, but before I build myself a machine, I thought it might be interesting to take a closer look at the filament, how well it really prints, and of course, how strong it is!
Basically, all 3D printing filament nowadays is made by extrusion. You feed plastic pellets together with some pigments into a screw extruder that melts and mixes everything, and then you pull the molten material to the right diameter. Equipment for this is pretty expensive and something that’s hardly feasible for home users. Pull-trusion simplifies this process quite a bit because you just pull a piece of PET tape through a cheap 3D printer nozzle and get filament out of it.

Cross-section of PulTrusion Filament
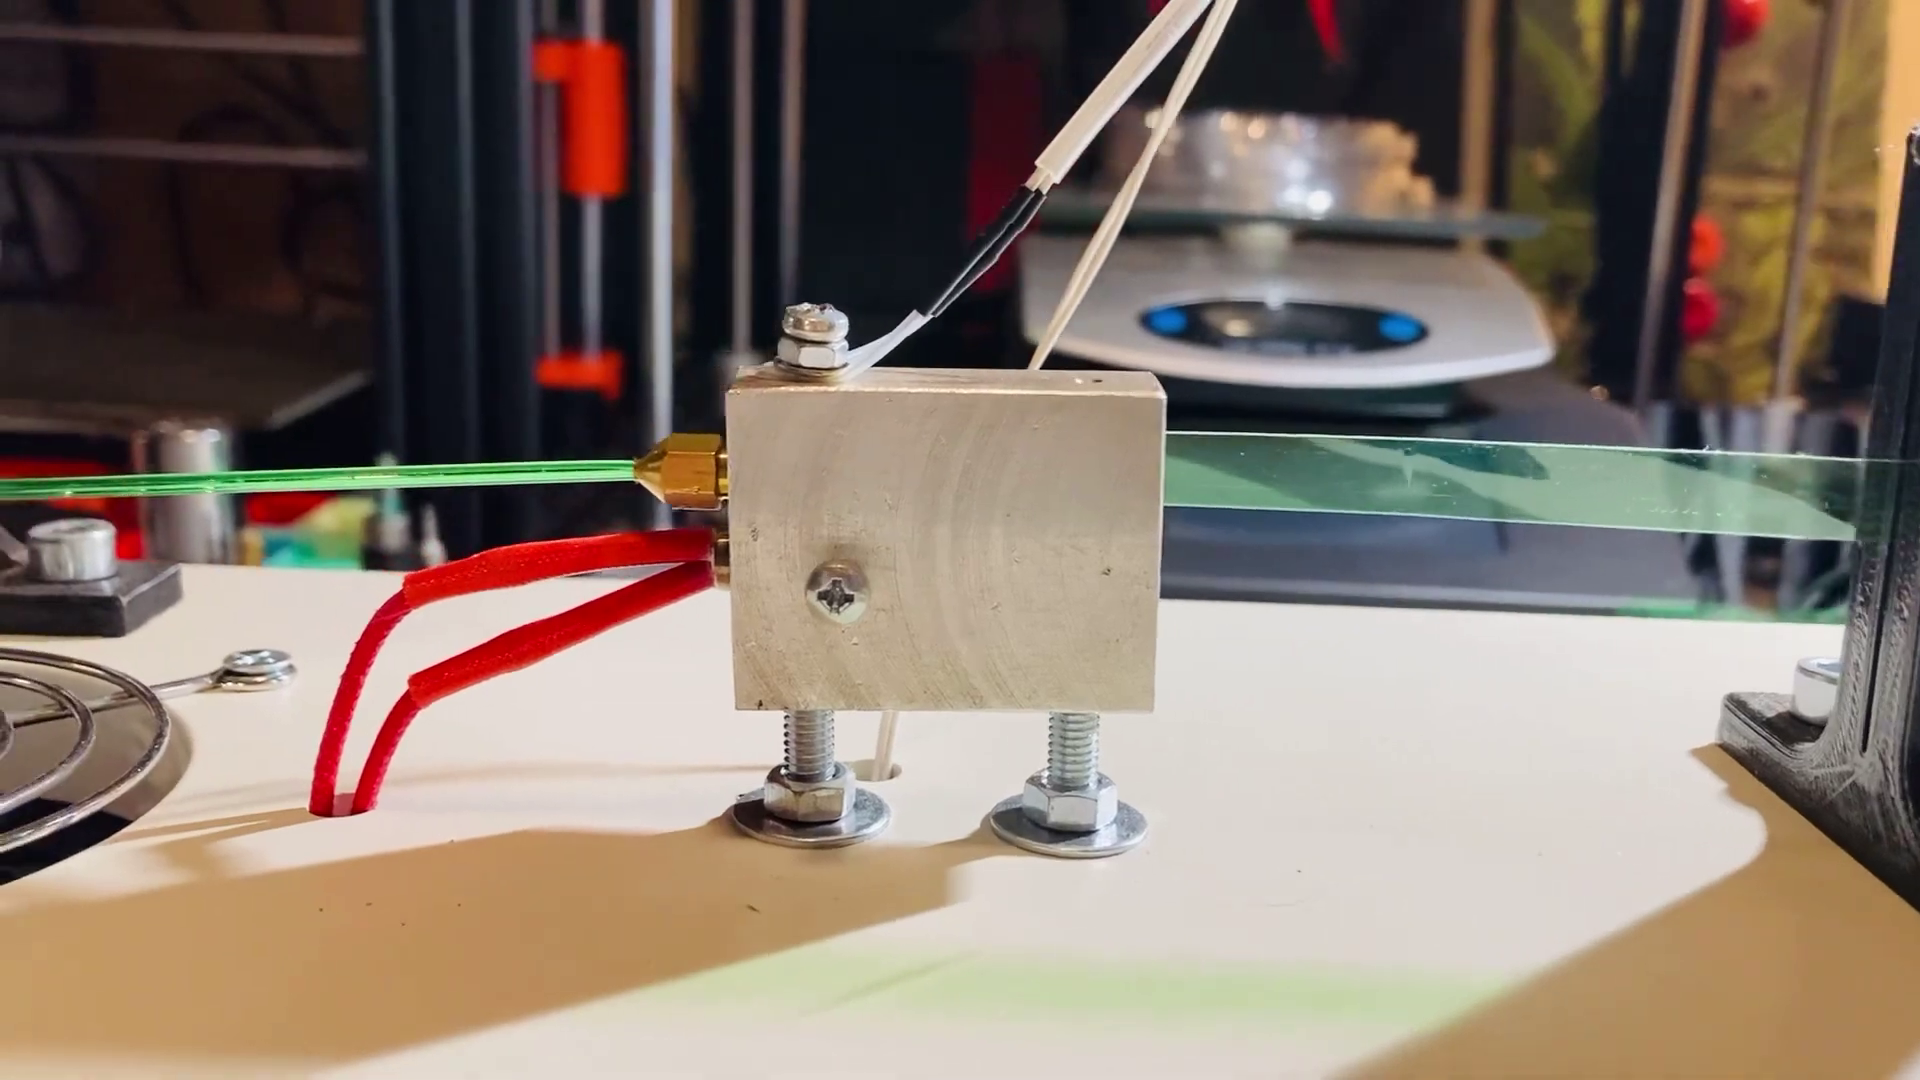
An average PET bottle has around 20g of usable material, so it’s not a ton of filament that you’re getting. The interesting part here is that the nozzle is only heated to around 200°C, which is below the material’s melting point to just make it soft. The nozzle then simply folds the soft material leaving you with a really interestingly shaped strand of plastic.
The nozzles are usually drilled to 1.6 mm, but due to the slight deformations after the shaping process, the outer dimensions are within a range of 1.6 to 1.9 mm. There are some gaps in the cross-section, so we will have to adjust our flow rate later. I’ve first seen that process implemented in Roman Naskashevs PetBot that you can get over on Precious Plastics.
PETBot (YouTube/Roman Neskashev)
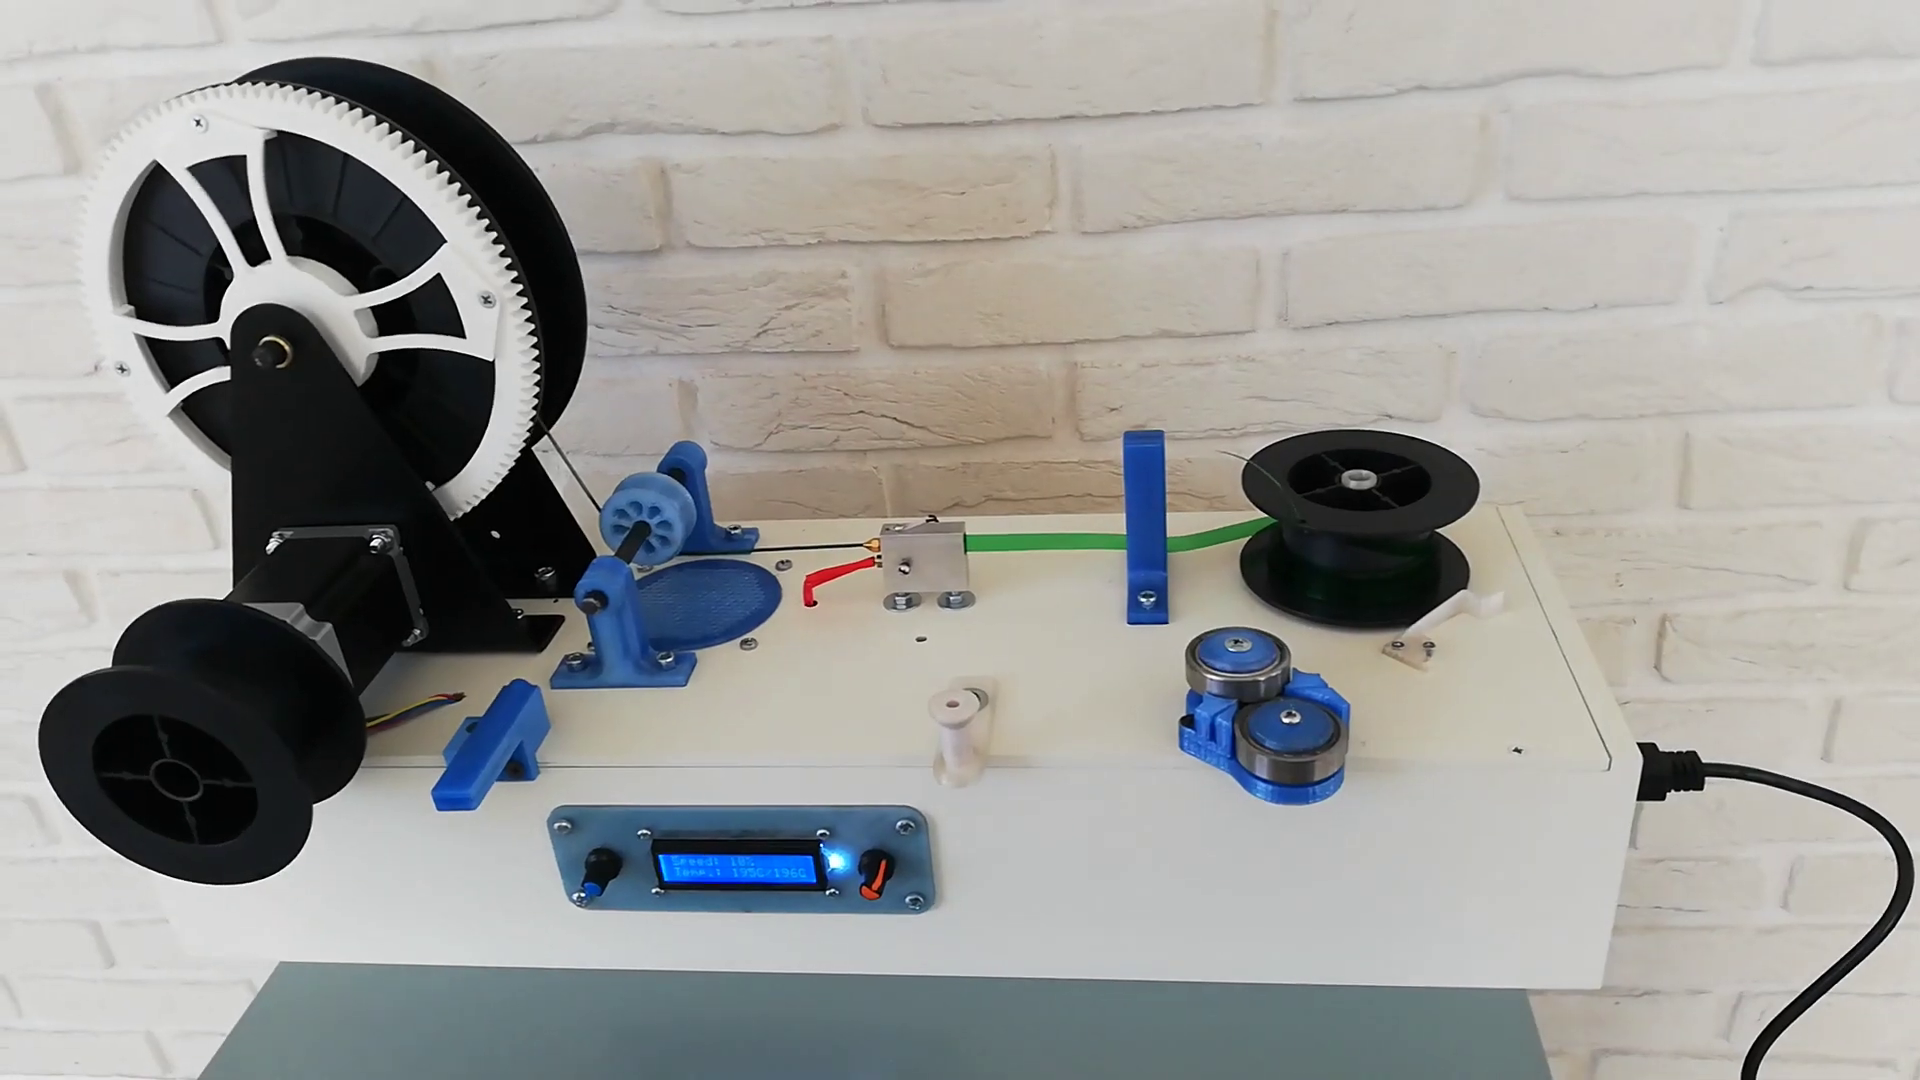
The materials Joshua sent me were exactly made on one of these machines. The PetBot is a recycling station that features an automatic bottle slicer and winder and next to it, the pultrusion station. It is not cheap with 235€ as a kit and 400€ assembled, and since it’s shipped from Russia might come with expensive shipping costs and import taxes. That’s why I’m so stoked that Joshua developed his recreator 3D, where he took a super cheap 3D printer and converted it with a bunch of printed parts to a PET filament maker that even combines slicing and pultrusion into one step! Great concept! Honestly, you could even build a working machine for only a couple of bucks with just a hotend and pull the material manually.

Recreator3D (YouTube/RJT3D)
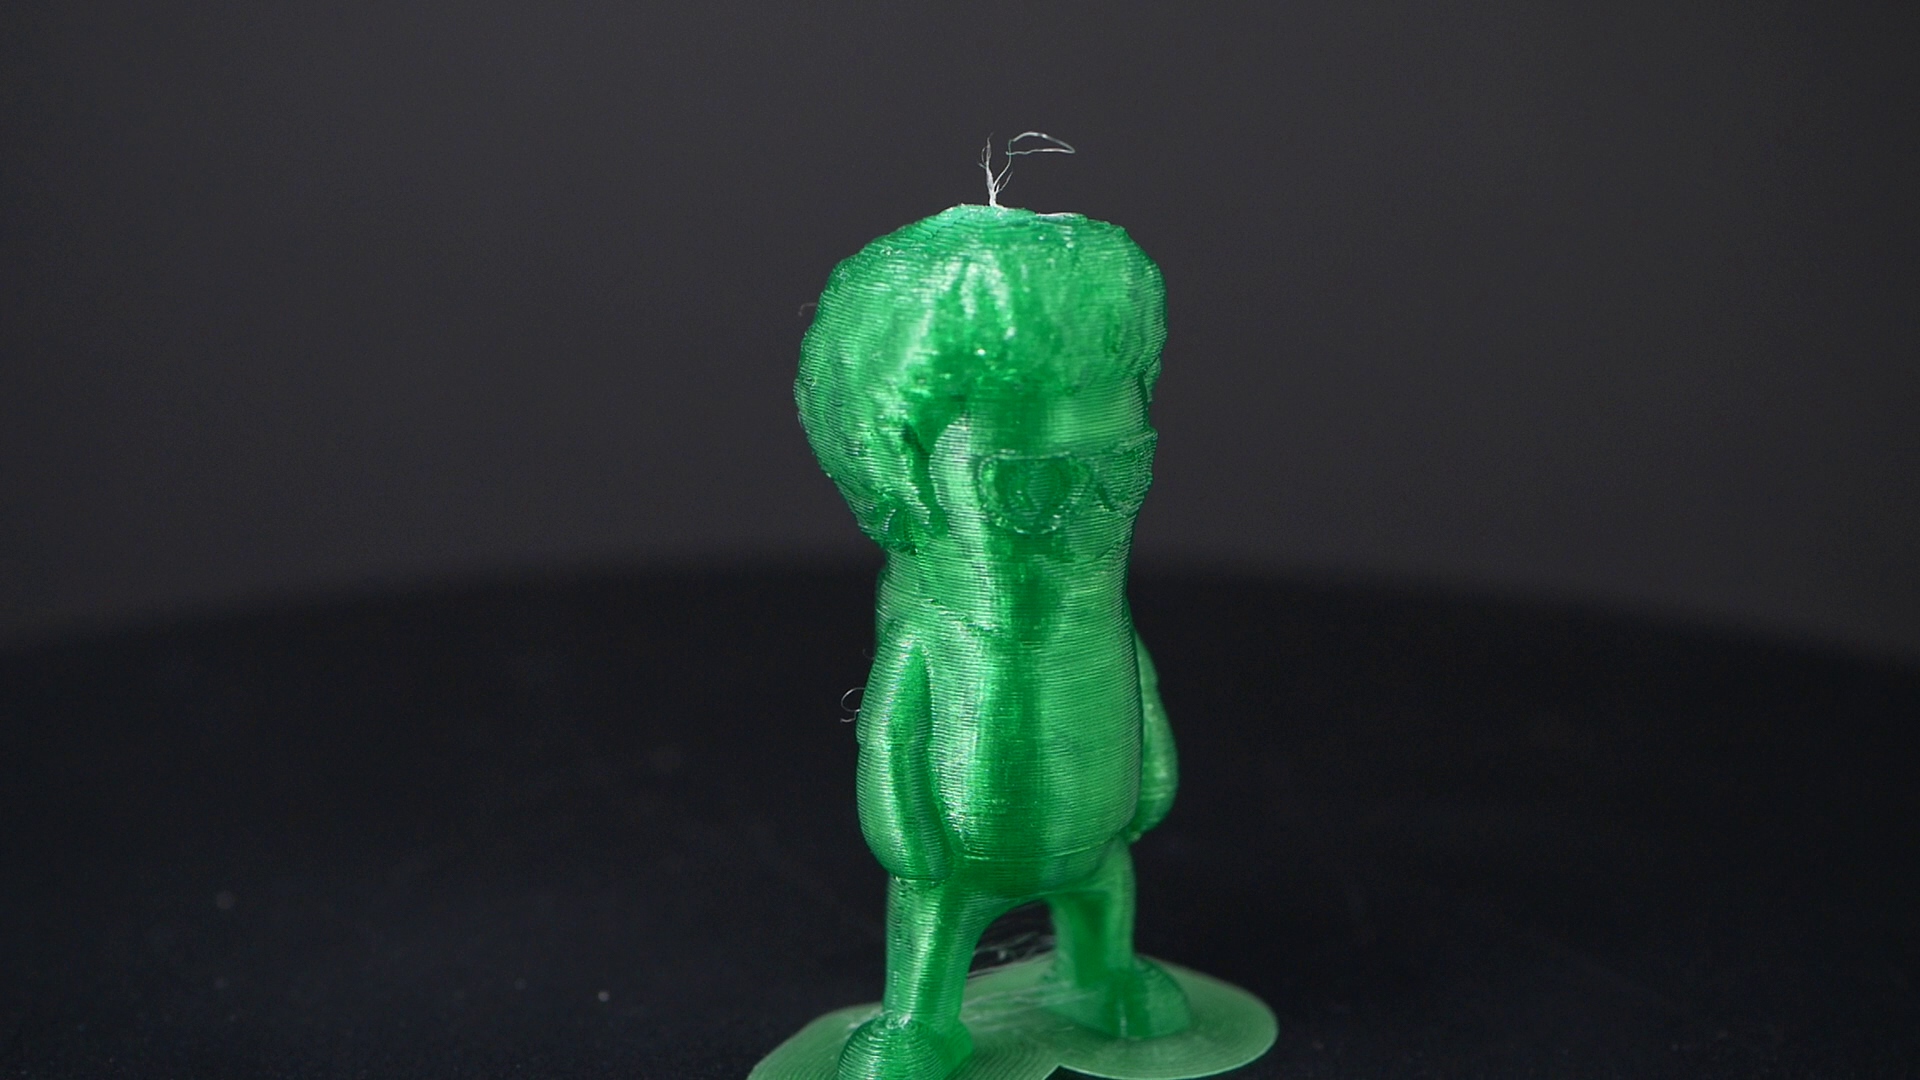
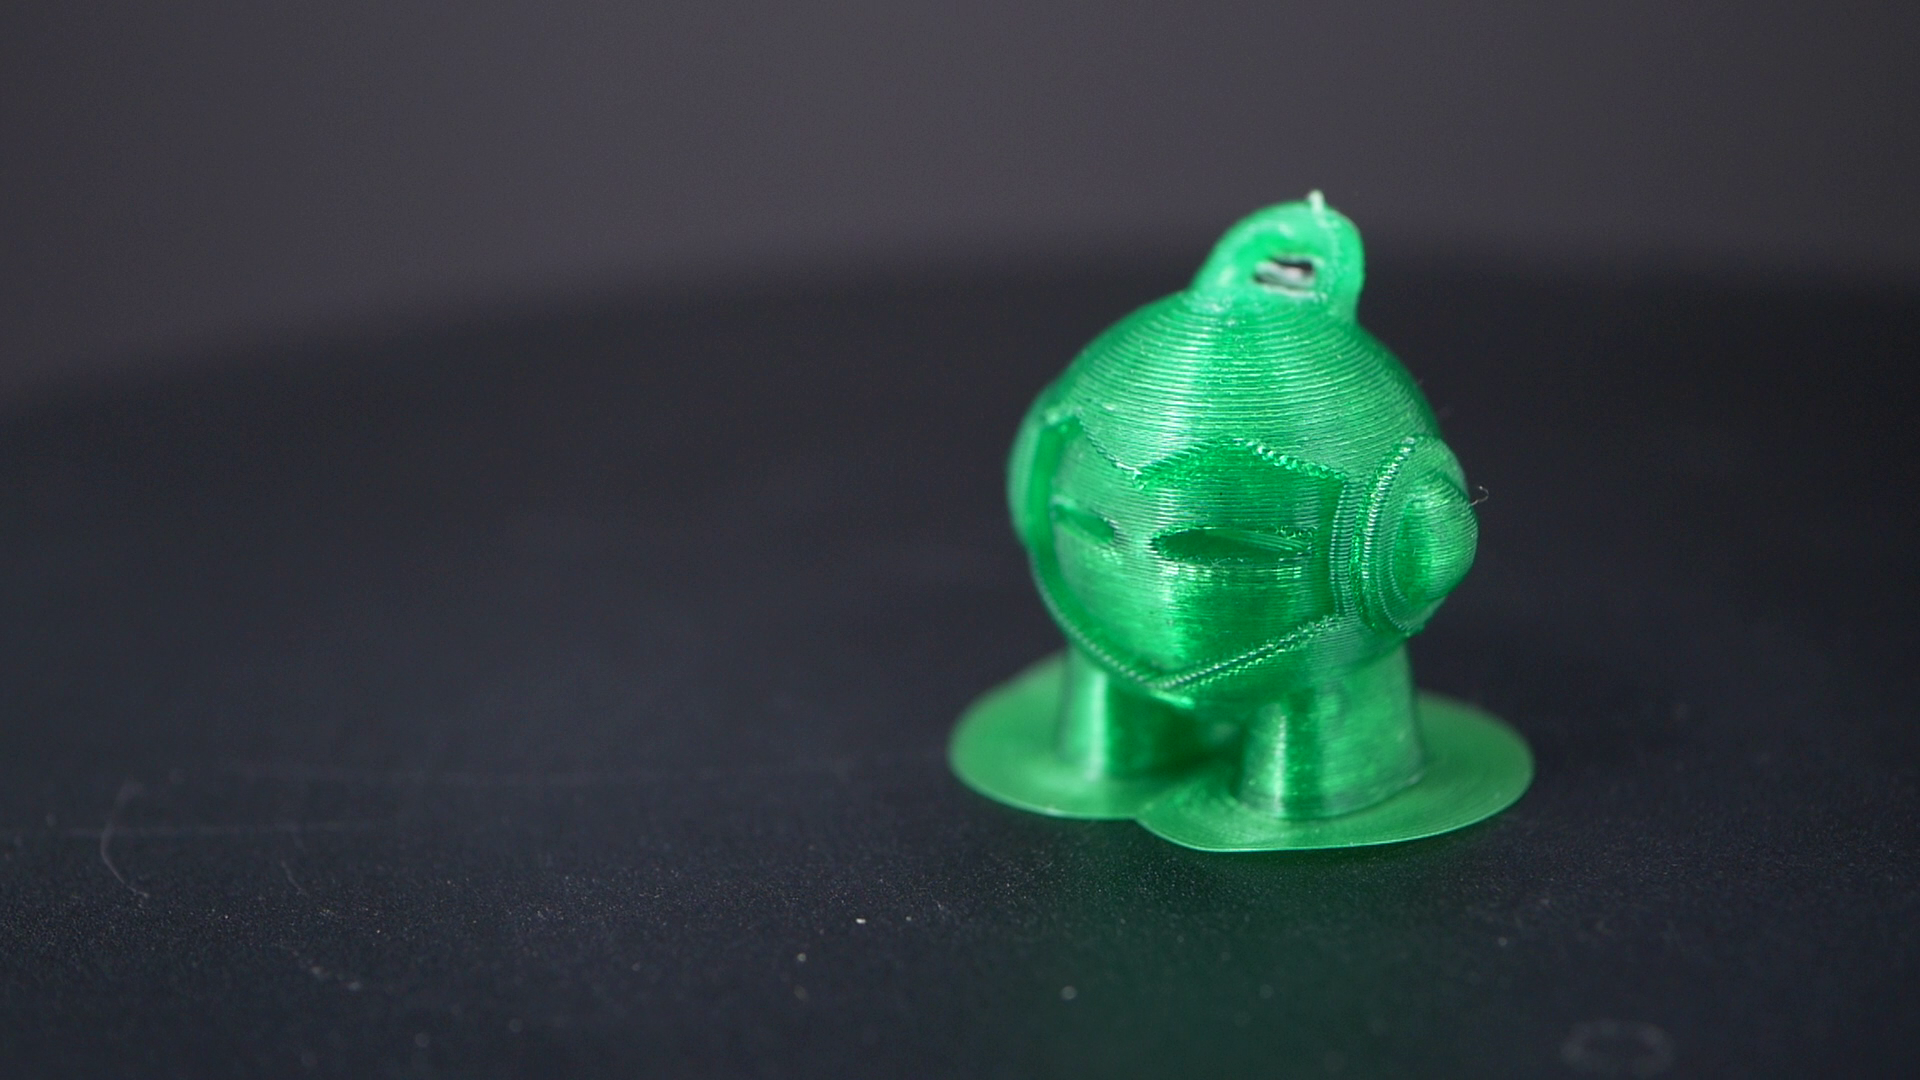
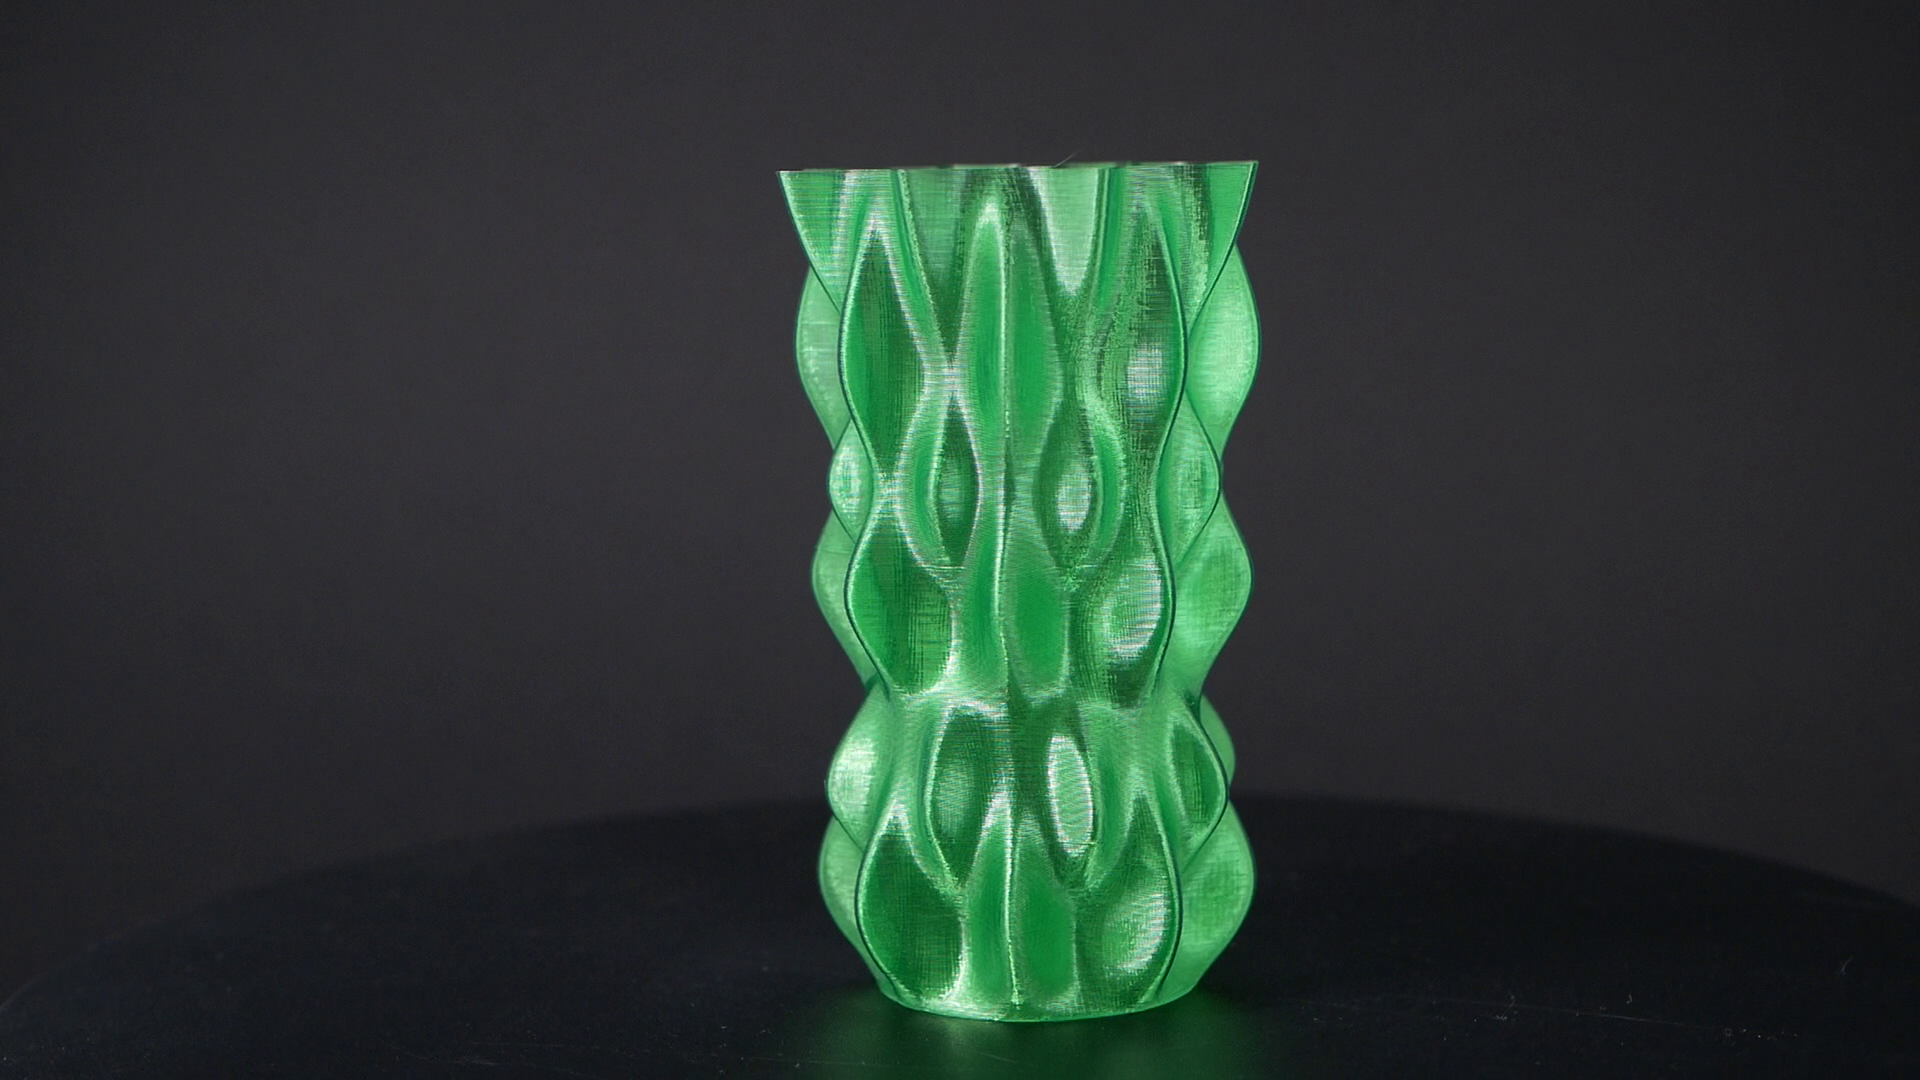
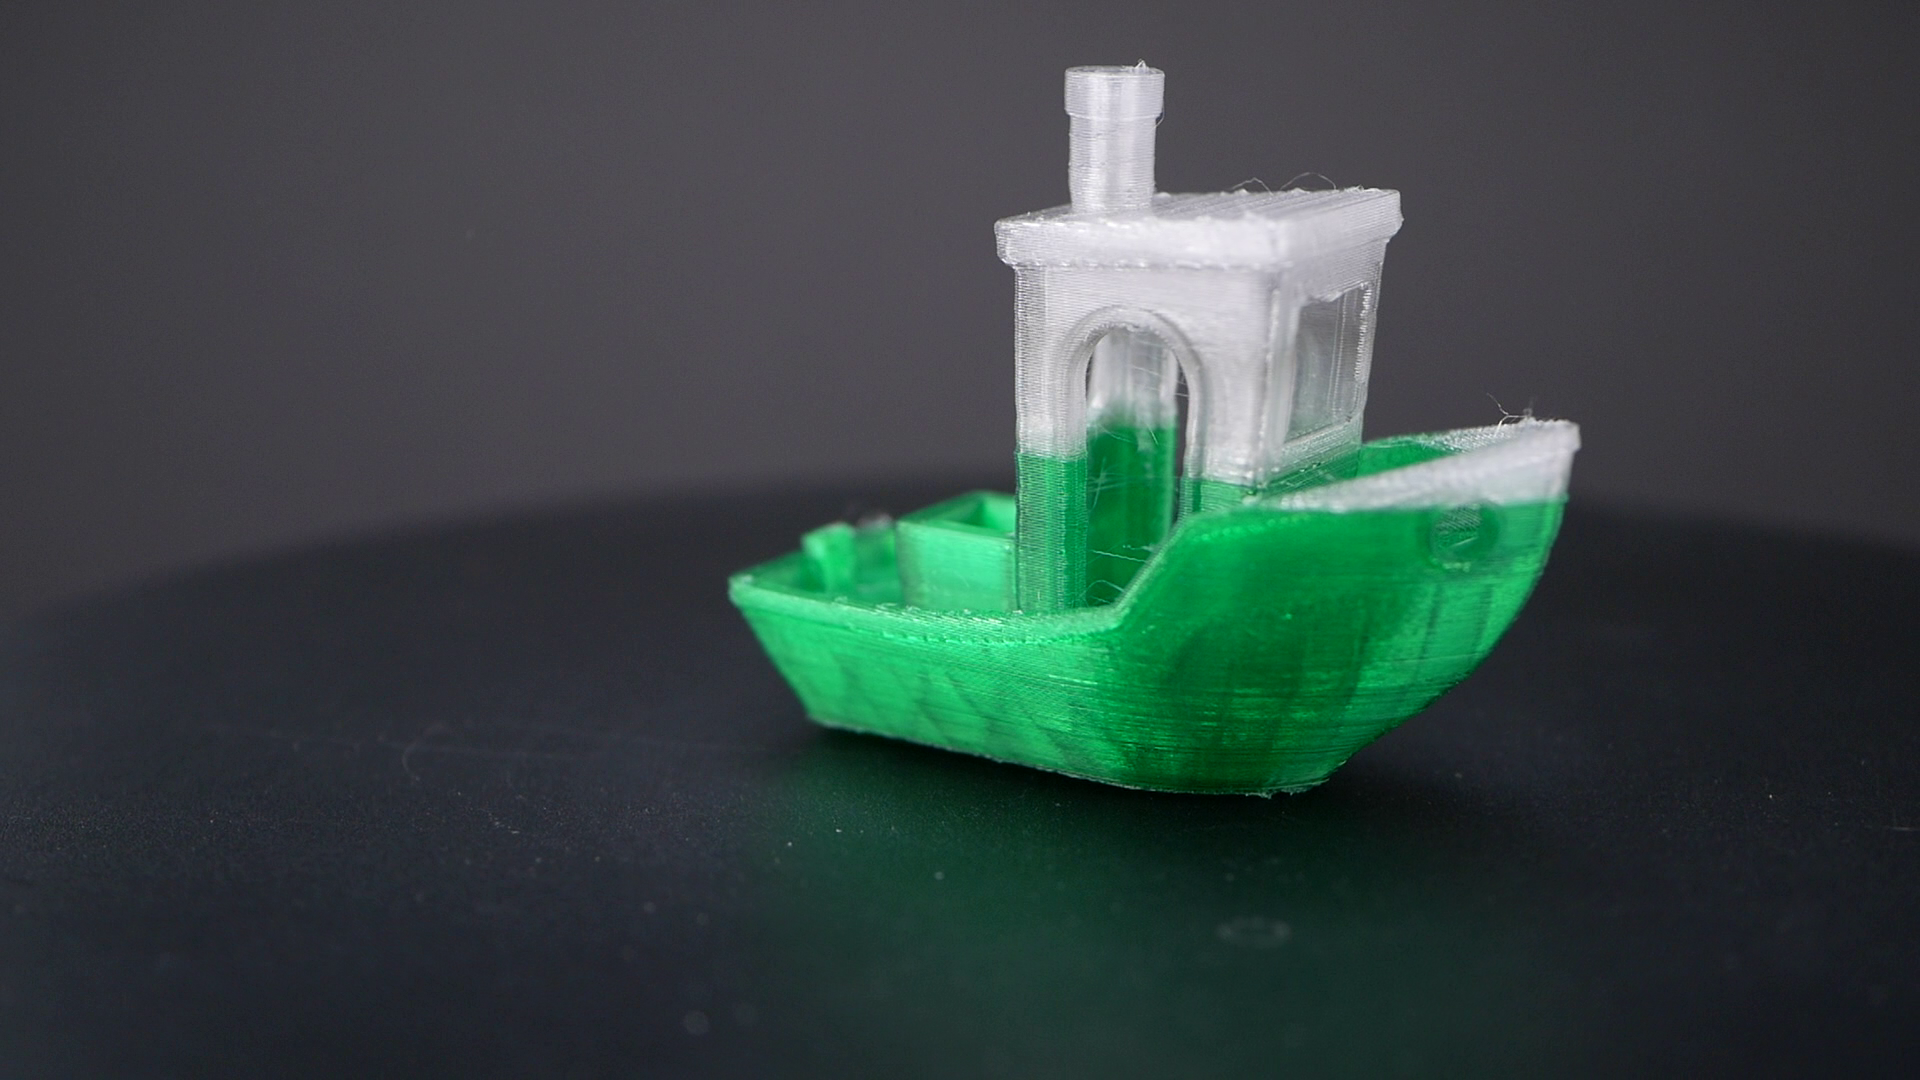
Well, how does this oddly shaped filament print then? Way easier than I thought. I used a standard PETG profile, raised the nozzle temperature to 260°C, and set the bed to 80°C while turning the fan to only 15%. Due to the difference in diameter, I set the flow to 130%, which was almost spot-on. I didn’t have a lot of material, so the number and size of my prints were limited. The Marvin printed in Fresca Grapefruit Citrus looked great. Super details, nice extrusions, and not a lot of stringing. The 3DBenchy also came out beautiful. I had to switch materials in the middle because the green mini spool ran out. Even the transition between the material looks super smooth, which shows that even though the filament is oddly shaped, the surface area of the filament and, therefore, the flow stays quite constant. Even though I used only minimum cooling, the overhangs look good, and even bridges printed remarkable. Keep in mind this 3D Benchy used to be half a Coke and half a Mountain Dew bottle. How awesome is that?! I printed the material on Prusas Textured PEI sheet and the OSEQ PEI sheet and had no issues with warping or adhesion! The parts, of course, have the same color as the bottles came out shiny and nicely translucent. So clear Coke bottles give you clear prints, green Mountain Dew bottles, green prints.
I later increased the nozzle temperature to 265°C and reduced speeds to only around 30mm/s because otherwise, the layers wouldn’t properly bond together. My test hooks looked superb and without any extrusion inconsistencies. The lying tensile specimens were super transparent, and the standing ones – wait, what – were white?! Okay, so let’s talk about the reason why there is sooo much PETG filament and barely any PET filament on the market, even though this polymer is way more used in other industries. Well, one reason is that PET is a semi-crystalline polymer which means that if you give the material enough time at higher temperatures, it will crystalize out, which is most obvious from the change from transparent to opaque. This crystallization process changes properties like toughness, stiffness, density, or melting point and makes the printing process more complex. The material will even crystalize within your hotend and if your temperatures are not high enough, it will clog! The thin structures on the tensile samples with the low amount of cooling stay hot for quite a while and therefore gives the material time to crystallize. This, of course, depends on the shape of the part and the print settings. PETG is the glycol-modified version of PET which doesn’t only lower the melting point of the material, but due to the more complex polymer structure, it stays amorphous. And since PETG has comparable properties, is printed much colder, flows better, and is usually less brittle, it’s just the way more suitable polymer for 3D printing. But let’s test my small set of samples and see how the recycled bottle PET performs in terms of strength and compares to other materials!

Test samples
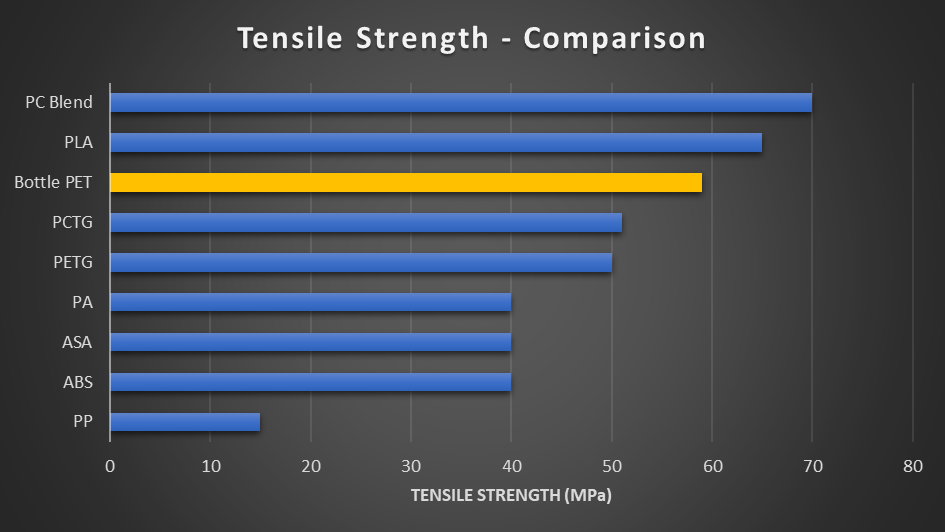
I first started with the tensile samples that I put into my DIY tensile tester one after the other and loaded them until they failed. With 59 MPa of failure load, they were definitely one of the stronger materials I’ve tested so far and different from PLA for example, they were really ductile and didn’t break. Unfortunately, all of the layer adhesion samples failed at the lug which doesn’t give us real numbers about their strength. If we omit that and just take a look at the numbers, the layer adhesion is seriously good with 31 MPa on average and is probably even better if we get the settings right. If we take a look at the rupture surface, one side even looks as if it was injection molded because there aren’t any layers or voids visible. Of course, the part crystalized, so it would probably be different on a normal part but still impressive results.

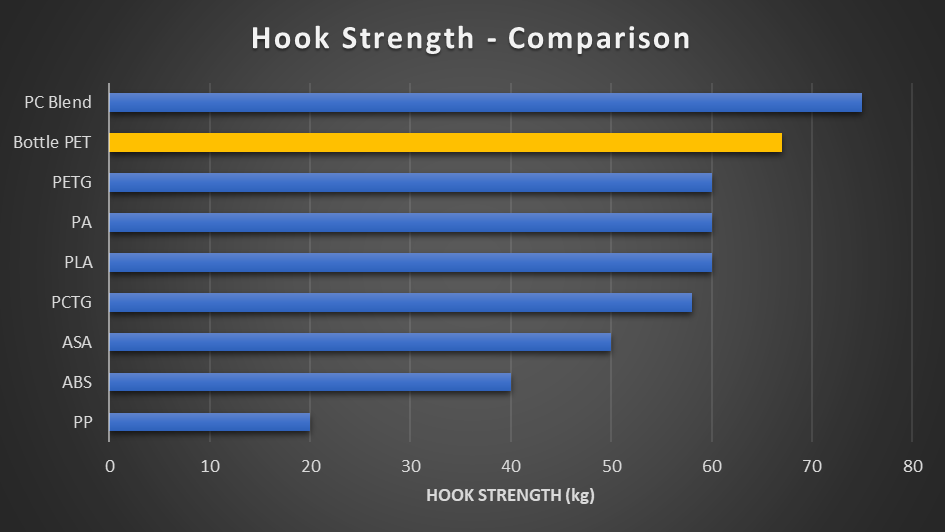
Next, I tested my hooks representing a more realistic part and loading scenario. The one printed lying failed at 67 kg, making it the second strongest material I tested here. Again, no sudden break but rather a slow yielding. Layer adhesion on the standing hook wasn’t impressive because the part failed at only 16 kg. There can be a lot of reasons for that, but I just didn’t have enough material to optimize the parameter at the moment. I think, if we would further lower cooling and increase the temperature, we might be able to see similar results as with the standing tensile samples.

Lastly, I checked the impact strength of lying samples with my impact tester. When the hammer strikes the sample, the part absorbs some kinetic energy. The more it absorbs, the tougher it is and the lower the final position of the hammer will be. The bottle PET samples were not the most impact-resistant with 7.5 kJ/m² but still landed before PLA and PETG.

Again impressive for being cheaply made from old bottles!


So there we have it. Honestly, I’m hugely impressed by the print quality and performance of this homemade, recycled PET filament. Of course, working with 20 g pieces of material is a pain, but maybe someone develops an easy DIY version of something like the Palette Splice cores to easily fuse the material because all other splicing solutions I tried in the past are just horrible! Another question is the economic and ecologic feasibility of this method. Here in Germany, we have a well-working bottle deposit system where 94% of all PET bottles get recycled, simply because there is a 25 cents deposit on each bottle. 25 cents for maybe 20g of material might sound expensive, but if you do the math, that’s just a bit more than 12€ per kilo for the raw material. Normal PETG filament sells for around 30€ per kilo. And there are plenty of countries with lower or even no deposit where you could have access to free raw material. Of course, all of this is not accounting for your time, the initial invenstment and the energy used in this process. I somehow see Pul-truding a bit like stuffing your own cigarettes. It can be feasible if you have the time; if you would otherwise work a job, don’t even consider doing it yourself. If you leave that out of the equation, this process is way more than a gimmick and really interesting for education to demonstrate perfect recycling of otherwise discarded bottles. The most interesting application for me are actually countries and regions where people either don’t have the money for buying filament or it’s simply just not available. PET bottles are everywhere and seem to make a great source for material that’s strong and well usable in a wide range of applications. Of course, you need a 3D printer with an all-metal hotend and heated bed, but these have become really affordable in the last few years. What do you think? If you want to learn more, check the resources and channels linked below, especially the YouTube channel of Joshua and this crazy Russian guy named Brother, who I, unfortunately, can’t understand but he seems to 3D print everything and even made an extruder that directly prints with these PET bottle strips! And here’s the question for you. Do you think I should build myself one of these recycling machines and properly investigate use cases, feasibility, and material properties? Leave a comment down below!
JRT3D YouTube Channel: https://www.youtube.com/channel/UCsv9RMNQvMnIgBzMo57i7NA
"Brother" YouTube Channel: https://www.youtube.com/c/Brother-live
PETBot: https://bazar.preciousplastic.com/machines/extruder/extruder-fully-built/petbot/
Recreator 3D: http://recreator3d.com/